


One of the new features of this site will be a blog that I will try to update regularly. Up until a year ago, I had no idea what a blog was. In fact, I would have guessed it was an old John Carpenter movie. But I’d be very wrong. My hope with this blog is to talk about current projects I’m involved in or perhaps a technique I’ve discovered or experience I’d like to share relating to my work…or maybe not. I’ll do my best to make it enjoyable to read. So for now, I’ll just say check by with me and we’ll see where this thing goes –
12/21/16 – For my first blog post, I thought I’d kind of start with one of the early decisions when beginning a restoration project involving paint work, am I doing it myself, sending to a shop or a specialized painter There’s an old song lyric that goes, “The old gray mare ain’t what she used to be”. Whether or not you remember that silly old tune, it often applies to that hunk of iron in your garage. The one you used to ride and cherish. The one that made you feel like you were invincible. The one that gave you a freedom beyond words. But let’s face facts, those days have kind of slipped away and that old girl is well past her prime. And the realities of daily life have pushed her aside to a cold, dark corner of your garage…or worse. But the memories are so vivid. How do we get that feeling back? Sure there are numerous pills that might artificially retrieve those halcyon days. But who needs all the side effects? No, what about actually restoring the “old gray mare” back to her former glory so every time you see her or take her on a ride, you create new memories, and best of all, no side effects. In my opinion, it’s very important that you create a plan and a vision of what you want to achieve when considering painting your vintage motorcycle. Are you going original or modified? If original, how “authentic” do you want to get? If modified, how much are you willing to change the look? Regardless of what you decide, remember, it’s your bike. So all final decisions should be yours. Input is always, sorry, did I say always? Input is sometimes helpful, depending on who’s supplying it. Most of the people I deal with, men and women, have a pretty clear idea of what they want, but often have trouble envisioning the final outcome, especially if choosing different colors or layouts from what the bike originally was. In such a case, it’s vital that whoever you are considering have a wealth of knowledge and experience to be able help you see that vision clearer and the ability to communicate it. Or in some cases offer a suggestion you had not considered that might appeal to you even more. But ultimately, it’s your call. If you are dealing with a shop, make sure they are willing to take the job on and have some enthusiasm about it. Many folks feel trapped with few options and bring their vintage tins to an automotive body shop. And while they are certainly capable, usually they are busy with production work and your baby might be relegated to a dusty corner, often leading to an unhappy customer. If you are going to entrust a specialty shop that focuses on motorcycles, make sure you see their work, if it’s just pictures, make sure you see close up detailed shots of the paintwork itself, not a picture of the entire motorcycle from 10 feet away. Ask a lot of questions about types of materials to be used, familiarity with your brand of bike and particular model and general level of interest in taking it on. Also discuss expectations and last but not least, cost. Will the number you are quoted be the final number when the job is completed, or is it a “suggestion” that will be adhered to as well as birthday party rules at Chuckie Cheese. If choosing an individual painter like myself, do all of the above and more. My job is not only to give you a “high quality paint job at a fair price” but to also make you feel comfortable in my abilities within just a few minutes of speaking to me on the phone, in person, reading an email response or even a text. It’s also my job to listen, offer advice or suggestions if needed, then create your vision into a tangible item that will meet or exceed your ideas. Being a one-man-show, I handle every single phase of the process, from that initial contact, to the final careful packing of your tins to arrive damage-free at their destination. Nothing is handed off to a helper with brief instructions. An individual should take pride in what they do. It’s their reputation out there on the line. So when you contact me or some other individual, make you hear that enthusiasm and confidence that will earn your trust and respect. Now let”s get to it!
2/6/17 – For this post, I wanted to talk a bit about finishes and materials. Ooooh, doesn’t that sound exciting? For those of us that grew up in Southern California, you probably remember Earl Scheib Paint and Body Shops. Earl Scheib was famous for his “I’ll paint any car for $29.95, no ups, no extras. And that includes wheels and door jambs” Mr Scheib was quite the promoter, on a par with another iconic So Cal car pitchman, Cal Worthington. Over the years, I recall that car painting price going up by $10 increments every year or so until it was well over $100 plus, still dirt cheap. How did he do it? Well, he used underpaid employees that could sand and tape a car in no time at all and just keep cranking cars through that spray booth all day, and bought his materials in mass quantities, like 55 gallon drums worth of paint, primer, etc. You’d pick a color from his color chart that resembled your car’s color to some degree or just went with a completely different one. Often times the end result was not what the sample looked like. In high school, my buddy John had his Bug painted there. He chose Antique Gold, looked cool on the chip. When we picked up the little VW, it was painted in Antique Gold. Unfortunately, it looked more like Catshit Brown once applied to the car. Either way, the materials he used were low-quality, designed to give your car maximum shine, fill some less than stellar prep work and make that car look new…for a few months anyway, slowly fading over time, until having all the luster and excitement of bologna on white bread. Well to turn out a nice product, that quick fix mentality doesn’t work. The idea is that once your object of affection is prepped and repainted properly, with care, it should last for decades and give the owner continued joy to look at every time. To that end, there is a mind-boggling array of paints, clears, undercoats and prep materials, some very high quality, some….not so much. And an equally mind boggling scale of cost. As an example, a gallon of urethane clear and hardener can be bought for under $100 or over $400. Are they the same? They’re both clear, but most of the similarities begin to wane after that. For me, while the bargain brand would help my budget out immensely, the benefit would be short-lived. And I dare say, I’d be out of business by now. There are numerous high-end paint manufacturers on the market, PPG, Dupont, Glassurit, BASF and others. For me, I use PPG products, and have for some years now. I find their products to be as good an anything out there and their technical support and training exceptional. For my “clear” choice, use PPG DC4000, a very high quality automotive-grade urethane and their 3085 hardener, shot over their DBC basecoats. And while these may not mean much to you offhand, to me they mean I get the type of color layout and curing I need to ship parts back to you with no “marks” from wrapping that an inferior clear will allow. Beyond that PPG offers me and ultimately you, very high quality direct to bare metal primers that create adhesion once a part has been stripped to metal so paint does not want to fly off at the glance. They also offer color selection that is second to none. So when thinking of a quality repaint, remember to ask questions about those materials. You deserve the right to know. See you next time –
4/18/17 – Well spring has finally sprung here in Vermont. And with spring come rebirth and renewal. And a person’s thoughts turn to love, or at least a nice ride in the warming fresh air. But enough about that, let’s get to the blog. This go round I want to talk about expectations when you get your object of affection refinished. When I first fell into this trade at the tender age of 17, I worked in a body shop for a man I was very fond of as I mention in the “About Me” Section. But when Bob “sold” a paint job on a car, it would make me cringe. He promised PERFECTION! And nothing less. Unfortunately the customer’s idea of perfection and his were usually different. Why? As a seasoned body and paint man he knew the realities of the business, imperfections that often found their way into a paint job, despite high quality equipment. But living in Southern California at the time, the customer’s idea of perfection was just that. So when the first minuscule flaw was discovered, the search was on for the next one and the an unhappy customer was born. More often than not, I’ve heard similar stories of shops or individuals setting expectations of perfection. And just like the situation my old boss created, often customers are disappointed because the person selling the job is simply not being honest. Ever since then it’s been paramount for me to explain expectations to a potential customer during our initial contact. So what should you expect? My goal is to deliver to you a final product you will be proud of. I pride myself in being honest. As a father of 4 boys and a faithful husband of 30 plus years, it’s served me well. So up front I want you to know that every job you see in my Vintage Vendor website gallery is flawed in some way, perhaps a spec or two in the clear or some other minor thing that tends to happen when you are creating a finish such as this. Most folks never see such flaws, but as the painter, I do. And while frustrating, doing it over will more that likely mean something else will happen but in a different place. So I assure you I do my absolute best to create a finish that will be superior and more durable than it was brand new. So I’m saying rocks and dead flies are acceptable? No. I’m saying I want you, the customer to know you are going to be happy, maybe even win a trophy at a show which some of my customers have done. At the same time I try to keep my prices realistic and turning out work I call “rider level? Every job in the Gallery is rider level. Will it be perfect? No. Will it be beautiful? Yes. Have I redone jobs? Yes. Have I made every customer happy? No. Have I tried to remedy every situation to reach a happy outcome, even if it meant a full refund? Yes. Bottom line, I want you happy.
8/2/17 – Hello all and welcome to mid-summer. This time of year, things tend to slow a bit for me as the heat of summer brings with it the desire to put some miles on your cycle on your favorite backroad. So the thought of giving up your ride for a few weeks may be more that you’re willing to do. I can certainly appreciate that. But…you knew there was going to be a but, it can also be an ideal time to get that paintwork done as I can typically get it done in less time then during the winter months, when much of the country is freezing it’s jugs (yes it’s a motorcycle term) off. So if you’re staring at that old bike wishing is looked as good as it ran, consider a summer paint job. I guaranty you’ll be glad you did. Either way, have a great summer!
1/11/2018 – Well the holidays have come and gone, New Years is ancient history and things are humming along here at The Vintage Vendor. The pace has picked up as this time of year, much of the country is in a deep freeze as it is here in Burlington, Vermont. So focus turns to restoration and inevitably paint work. That’s where I come in. Lately there’s been a lot of Nortons to show up. But don’t let that stop you non-Norton owners fret. I’m an equal-opportunity painter. Next week will be a BMW R65, last week, it was a Swiss made Mondia Super professional racing bicycle. And this week, restoring a bunch of parts for a customer’s ’36 Ford Roadster. So as you can see, there’s always something interesting happening here. Well, interesting to me anyway. So figure out your gameplan and let’s get a jump on it before the snow melts! If you’re still in the thinking stages and having trouble focusing on a plan, feel free to contact me and let me offer some advice on logical direction as it’s often easy to get derailed on a project or projects. I’m here, on the job and happy to help. Talk to you soon!
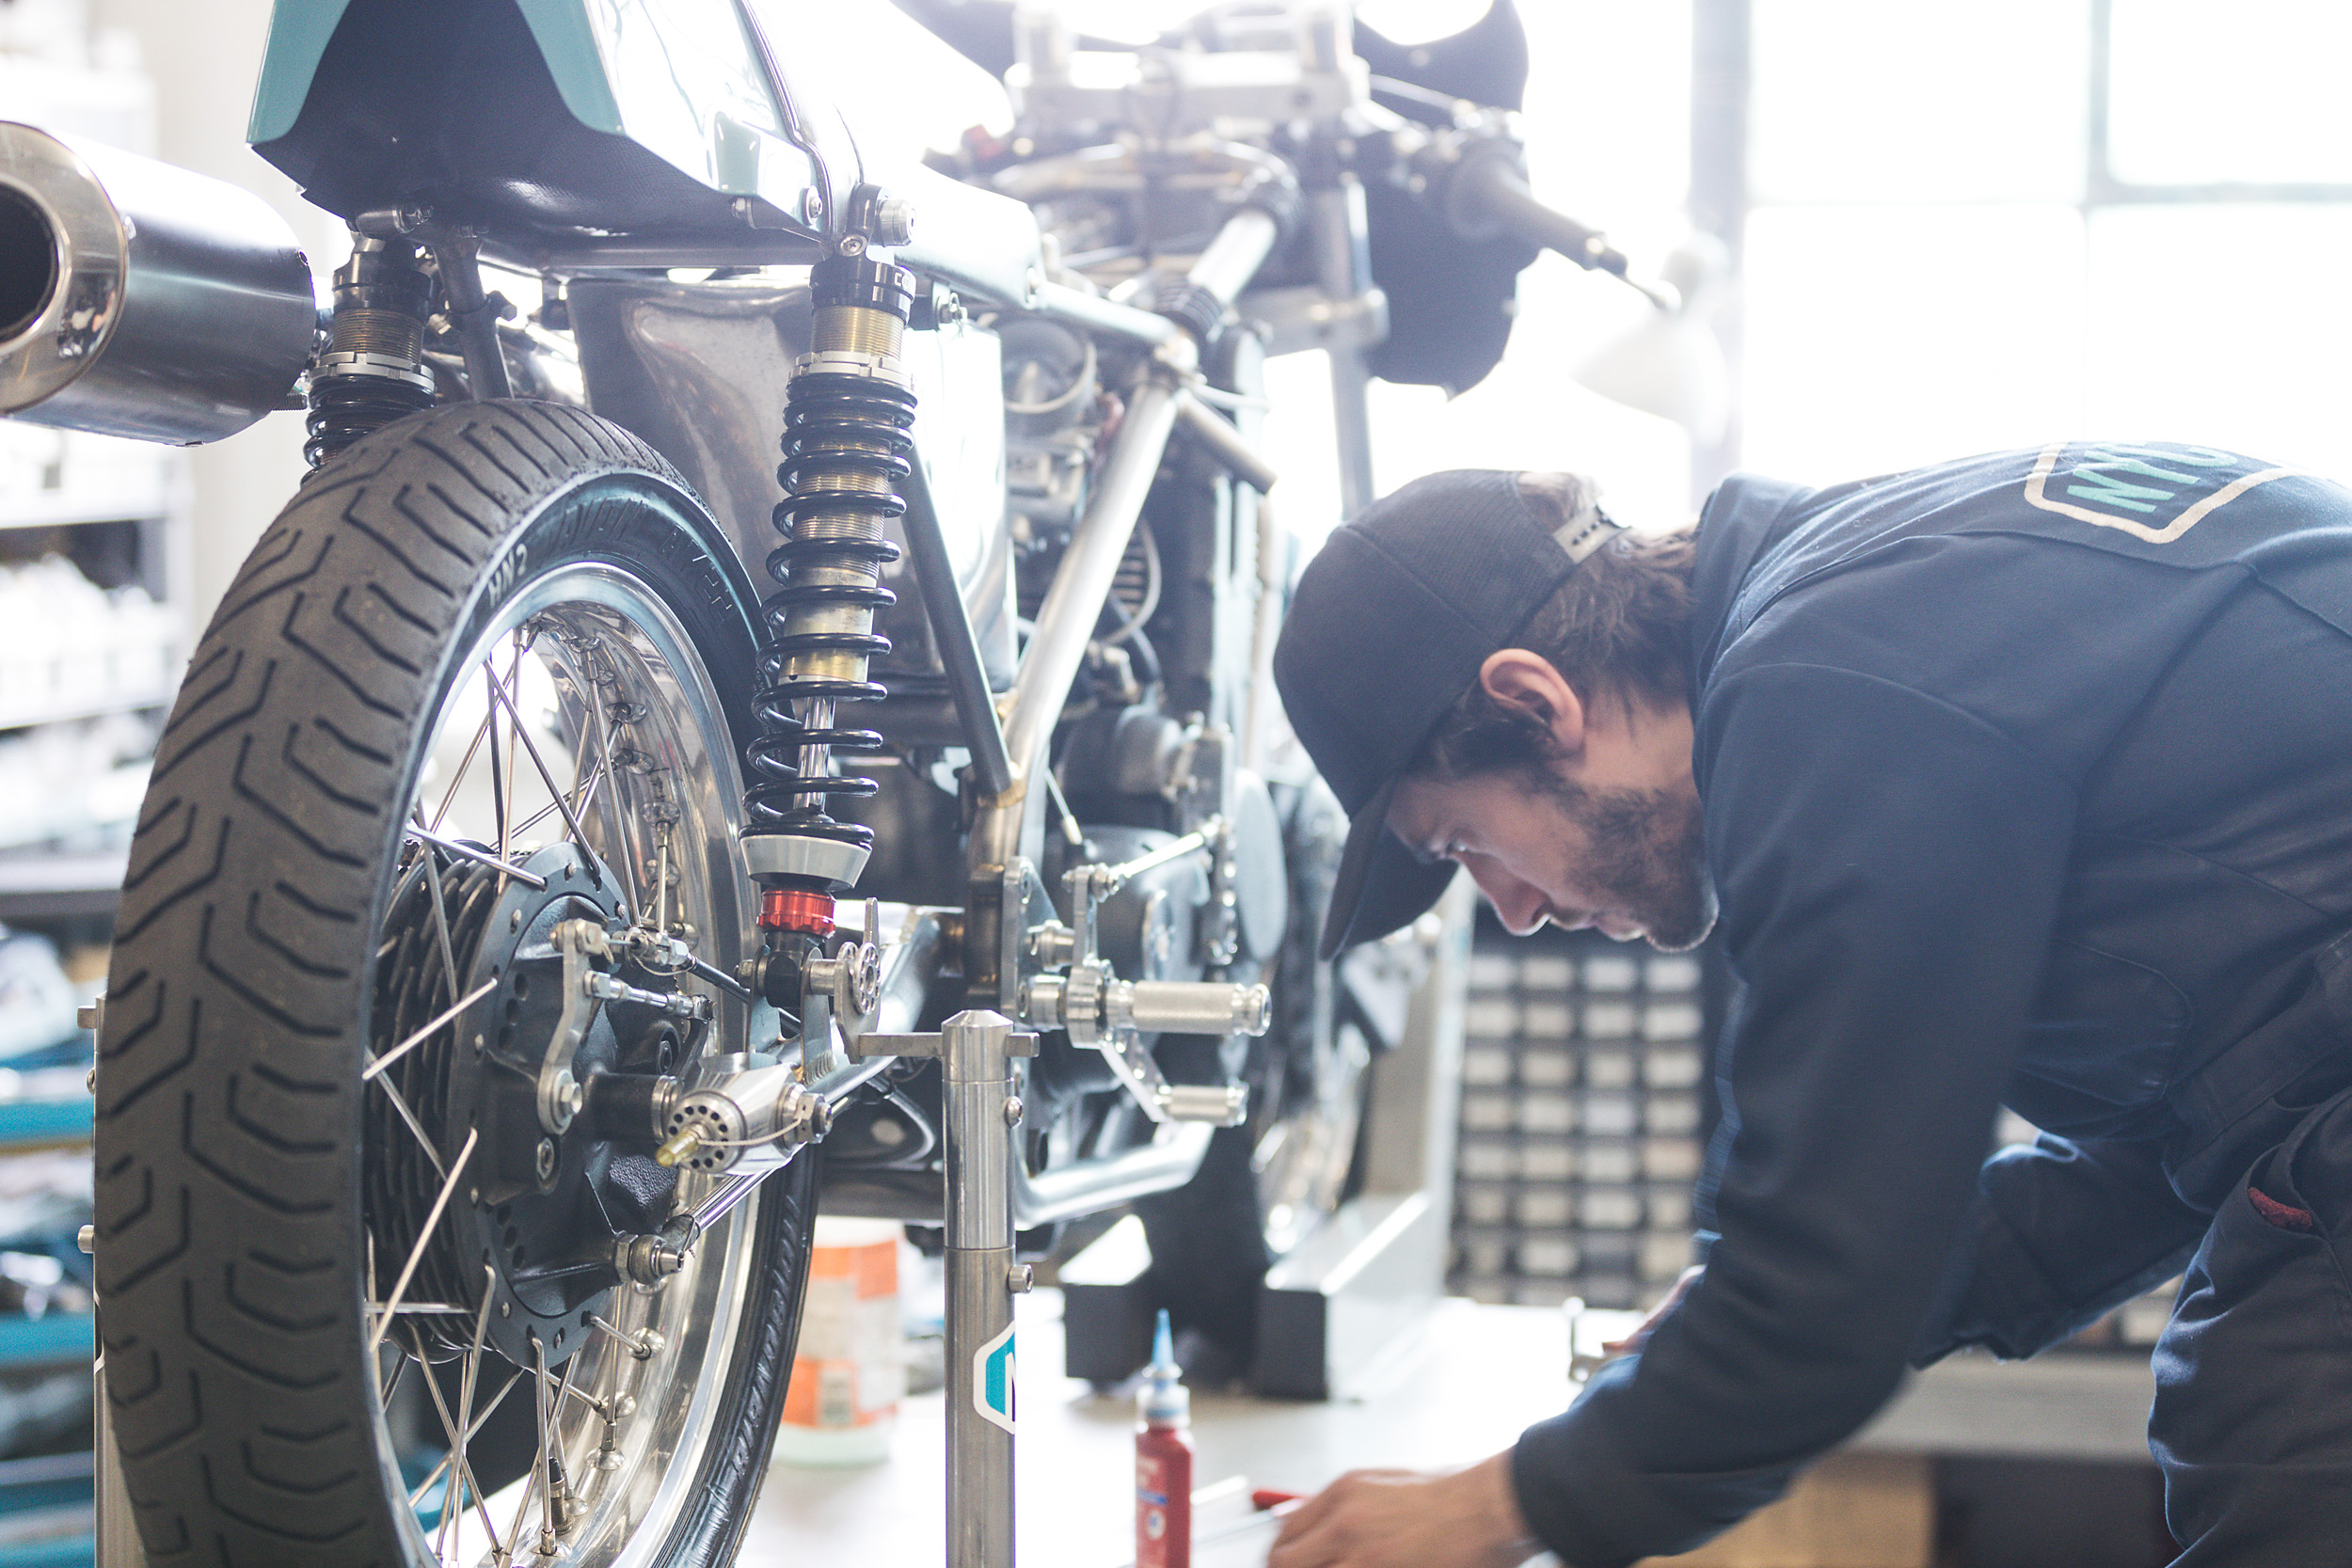
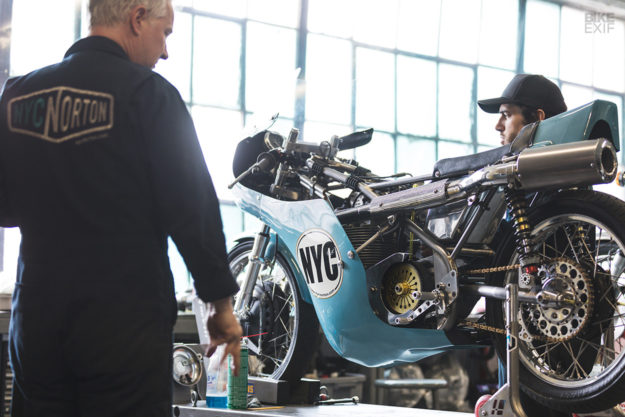
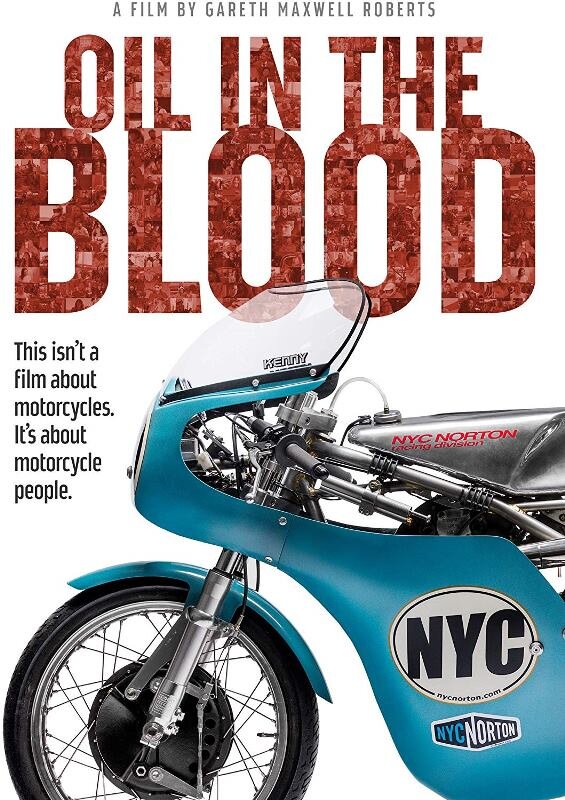
4/20/2018 – Back in late February, I got a call from Kenny Cummings. Kenny as I’ve mentioned in other places on my site is the owner of NYC Norton. He and his team specialize in high performance, vintage racing motorcycles. Kenny himself is a world-class racer on the vintage ARHMA Racing Circuit. Below is a shot of him, #17 attacking a corner on his
Seely Norton.
/cloudfront-us-east-1.images.arcpublishing.com/octane/HEJU76TPBNWGTY3HE3ZIR6UOJY.jpg)
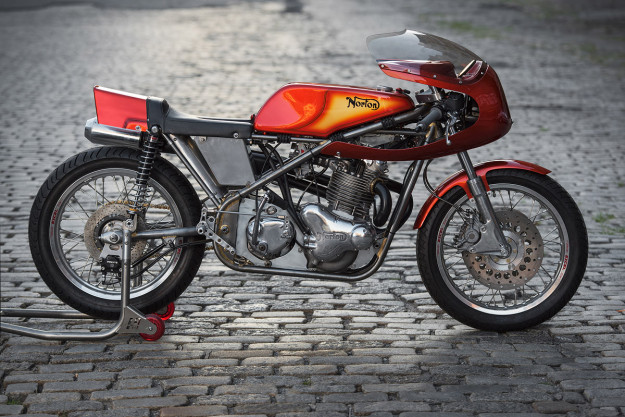
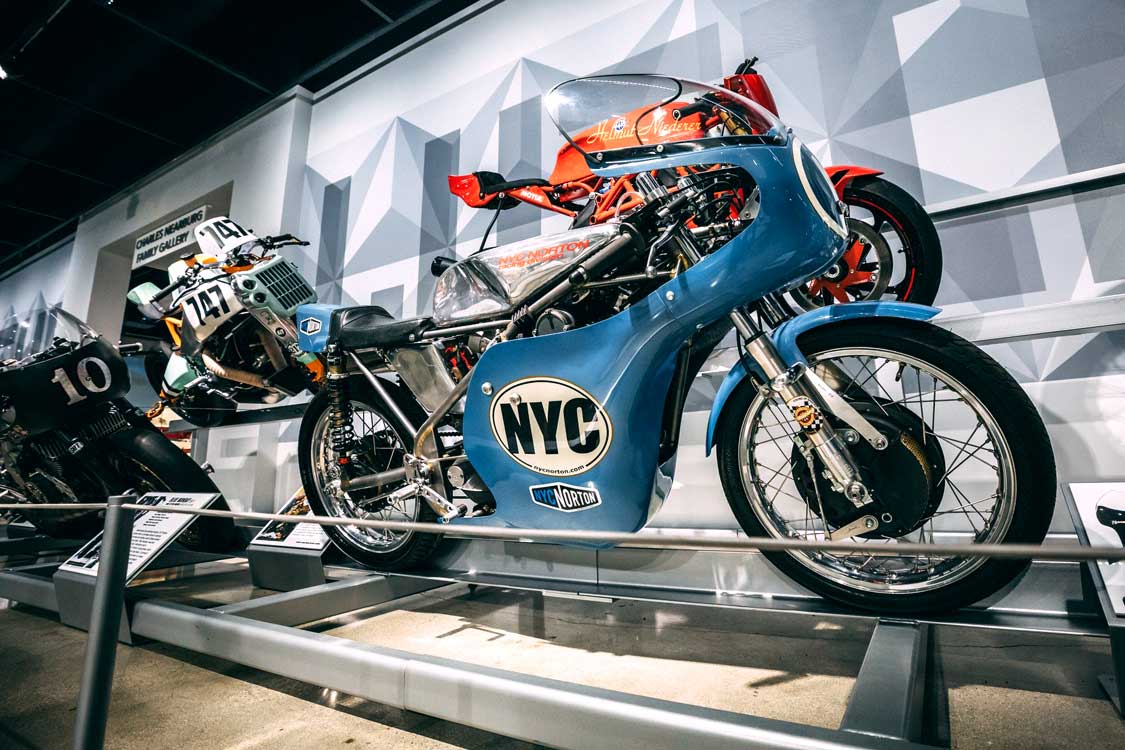
Kenny had just gotten a call from the curator of The Peterson Automotive Museum in Los Angeles, Paul d’Orleans. If you ever get the chance, go. It’s a premiere museum in the heart of the iconic “Miracle Mile” District. The call was an invitation for Kenny to enter one of his motorcycles in the “Custom Revolution” exhibit that would be running from April 13 2018 – March 2019. Paul was hoping to get “The Sunburst Bike” (shown below) that Kenny and I previously collaborated on, but that bike was on the other side of the globe where the owner resides.
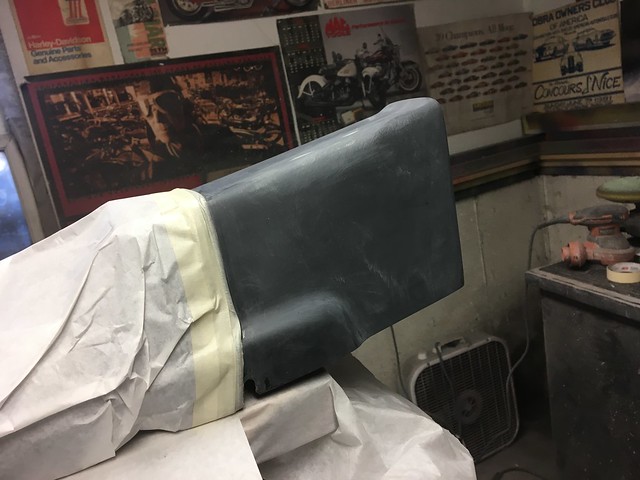
Fortunately, Kenny had a racing chassis close to set up, but it would need bodywork and paint. That’s where the aforementioned call to me came into play. Kenny laid out the story, his rough idea of colors and design and asked if I’d be interested. You bet! Oh yeah, and he needed it back in his hands in 3 weeks. HUH? Considering he still had to purchase the parts and ship them to me, and they would need to be hand delivered, this was a tall order, realistically more like just over 2 weeks. But buoyed by thoughts of fame and fortune, or perhaps just stupidity, I agreed. Two days later, I had the bare fiberglass nose piece, full fairing and tail section in my hands. What had I gotten myself into? Below are some preliminary sketches I drew by hand so Kenny and I could begin to get on the same page. 
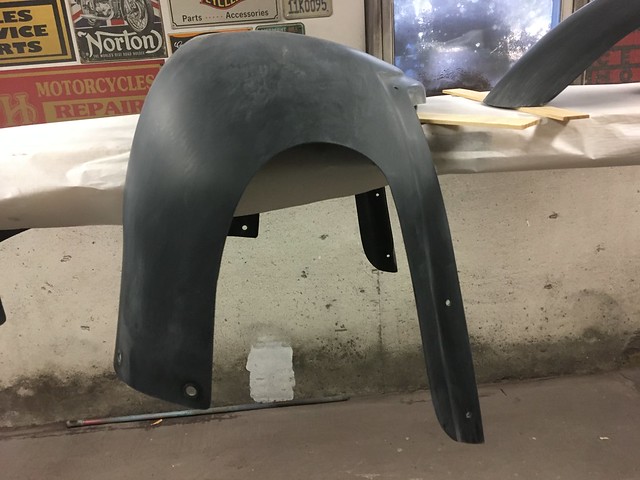
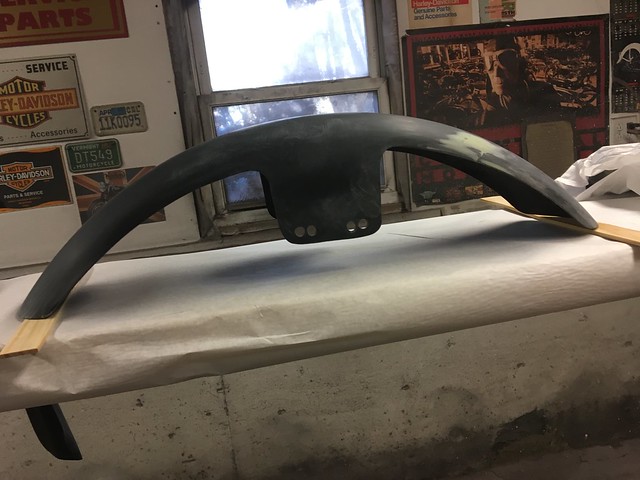
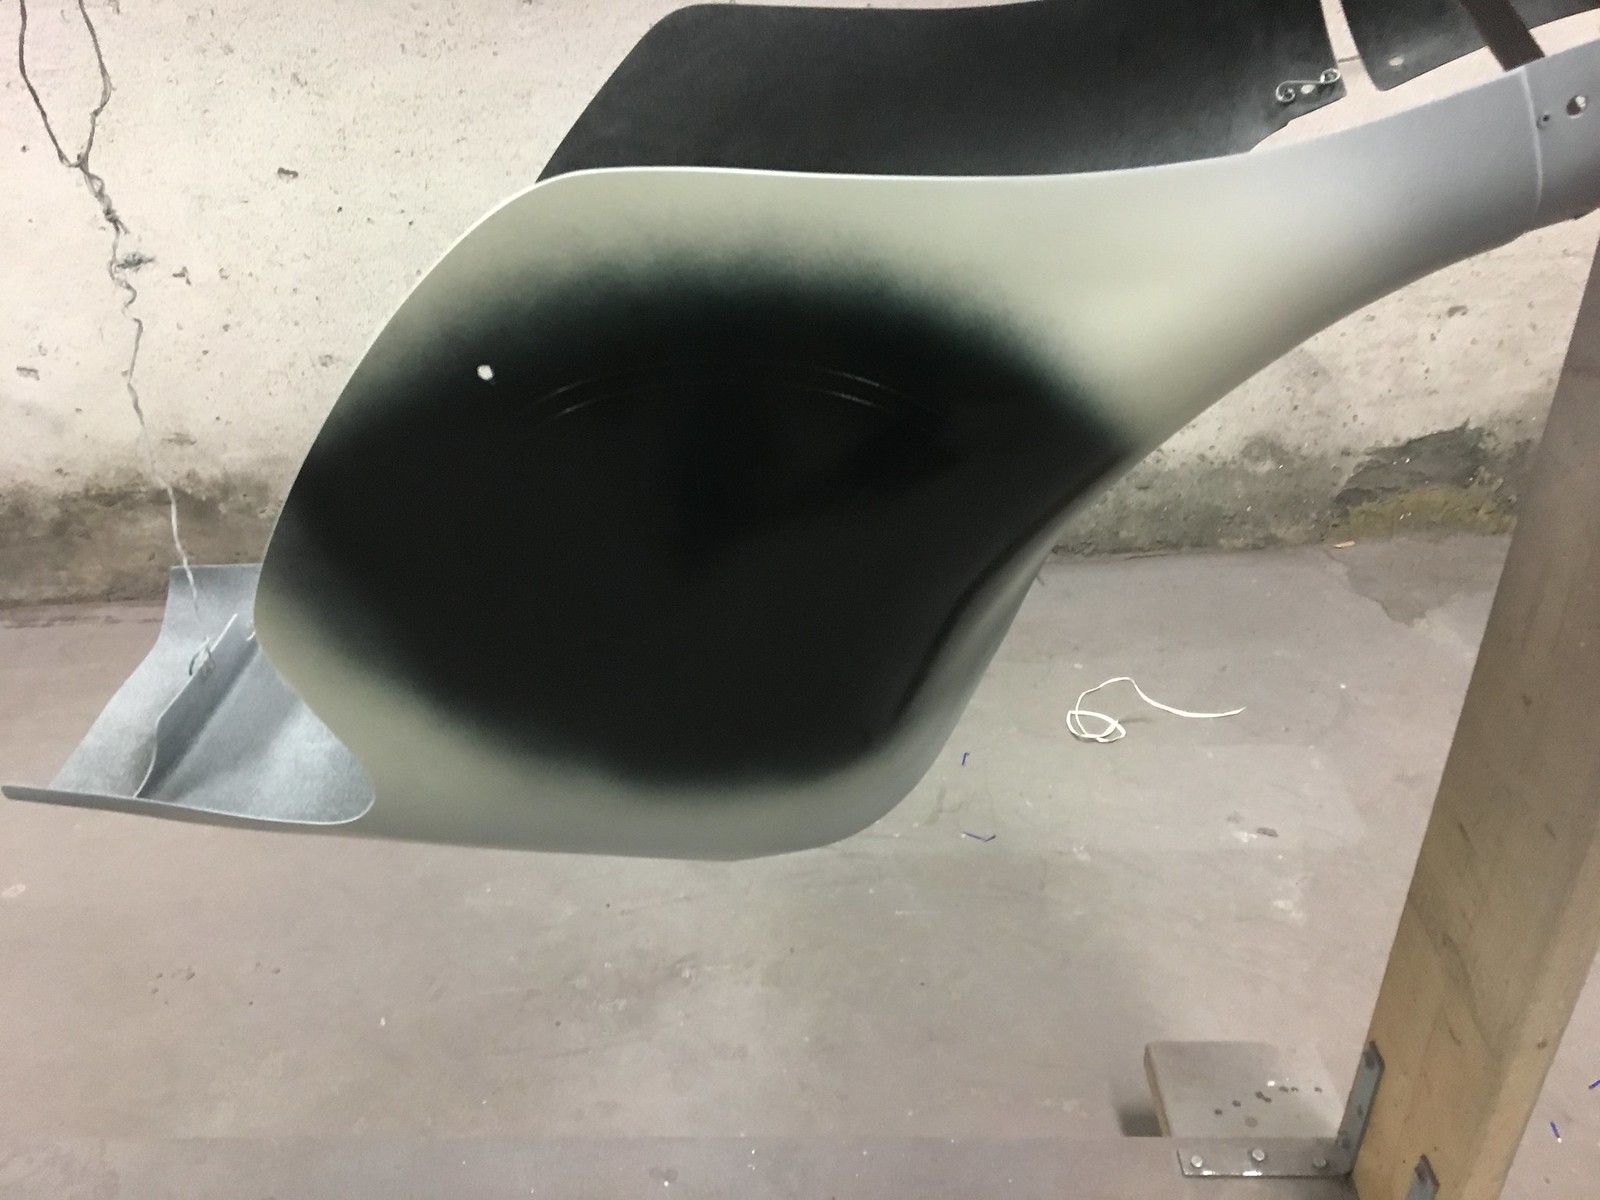
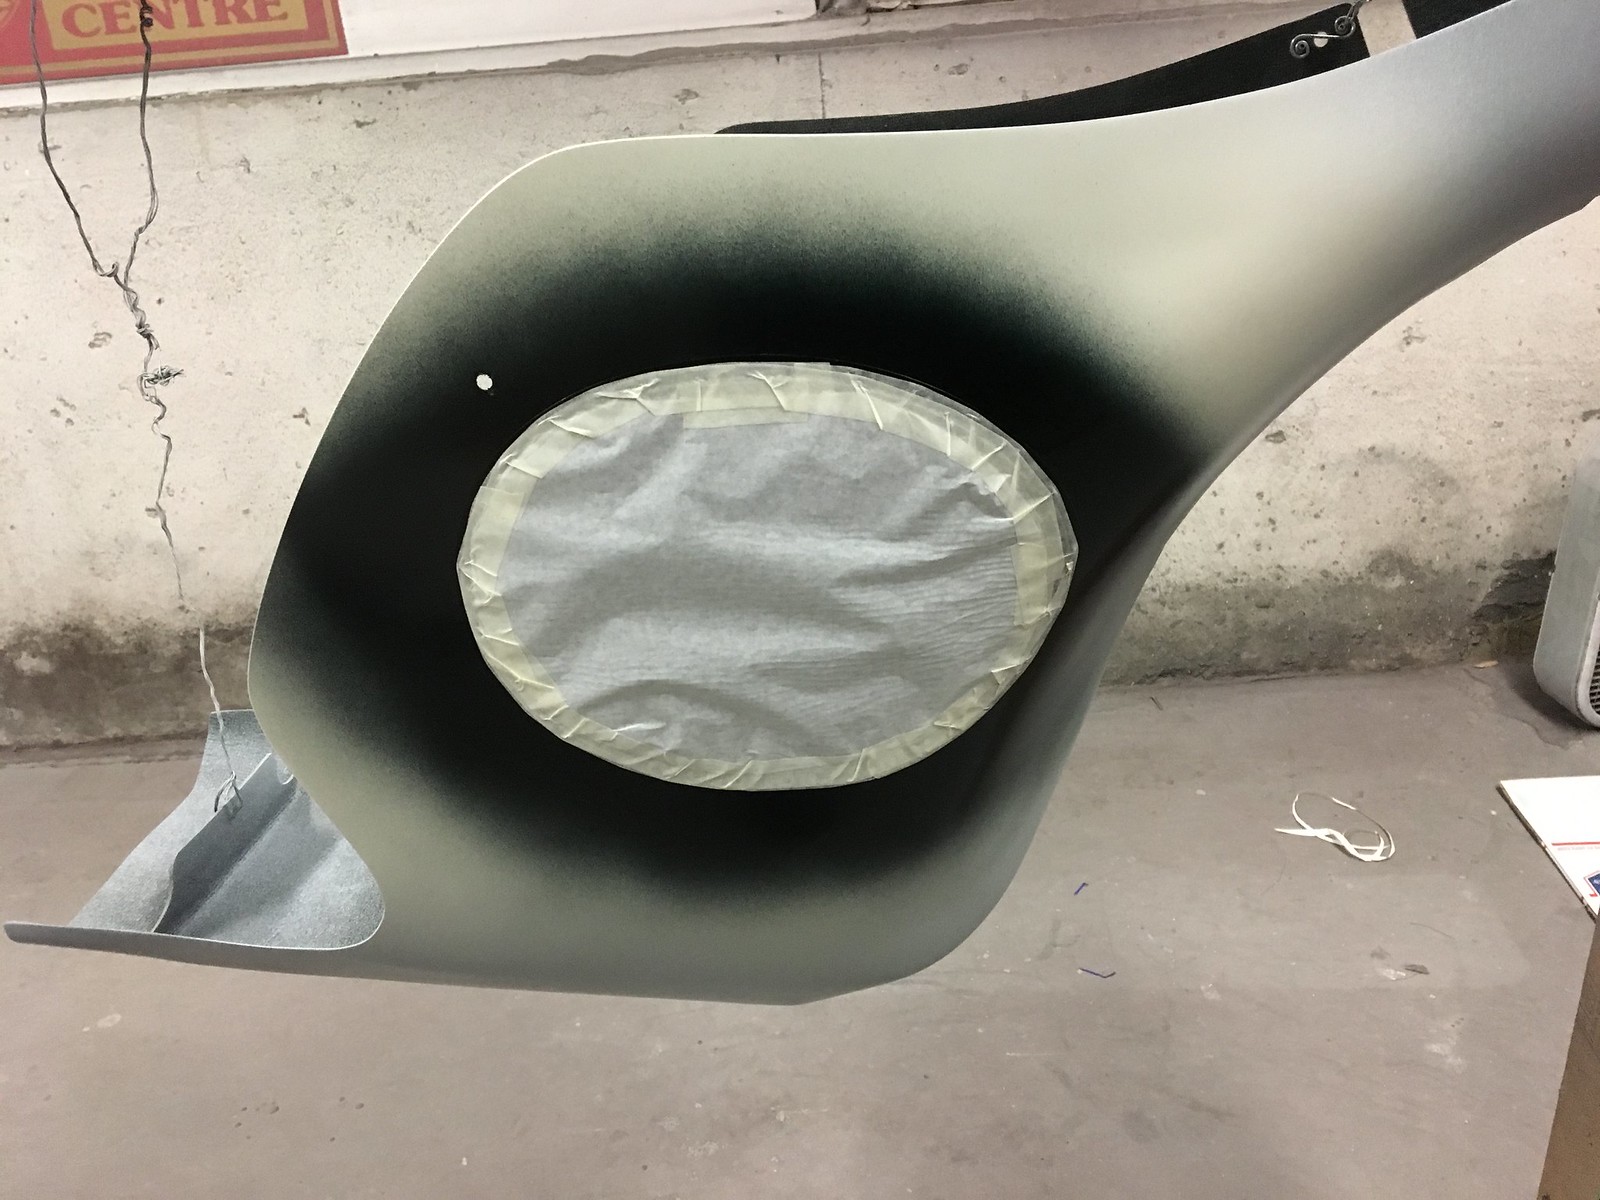
Over the course of the next two weeks, through countless phone calls, emails and texts. we finalized the design and colors and the project took shape. All the while, we realizing like on all those silly TV shows on Velocity TV, we too we under a serious time constraint. Only this was REAL, not “Reality” TV. And win, lose or draw, this was now in my hands to get it done and done to the level worthy of such an honor. Believe me when I say this was no easy process as we struggled back and forth on getting the colors and all that was involved to get this project where it needed to be. These first shots below show the bare parts, sanded and ready to be epoxy sealed. Whew, I’m getting sweaty just reliving it all. Can I get some water? 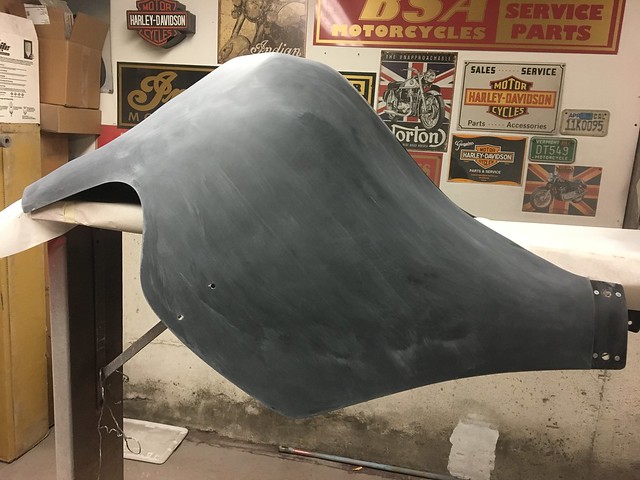
And while Kenny’s original idea was a candy apple red, I felt that color while nice, had been kind of played out on so many custom applications. In the end, he agreed. His next idea was a grayish-blueish-turquoisy? main color. He’d seen an image of a bead, yes a bead. That was the essence of what he wanted. Well that should be easy, just make that motorcycle look like a bead. Kenny – “Remember Brent, when in doubt, it all goes back to the bead” And so it began….. from a bead.
Being as I didn’t have the bead in hand, we had to rely on computer images, not ideal by any means. Then one morning my wife walked into our kitchen with this color below on her toenails. “DO YOU HAVE ANY MORE OF THAT NAIL POLISH?” “Kenny, I think I’ve got the color!” “That’s not bad, but remember, it all goes back to the bead.”

I mixed up some colors, did several spray-outs until we could go no further. “How about these Kenny?” “Remember, it all….”, yes, well you know the rest by now.

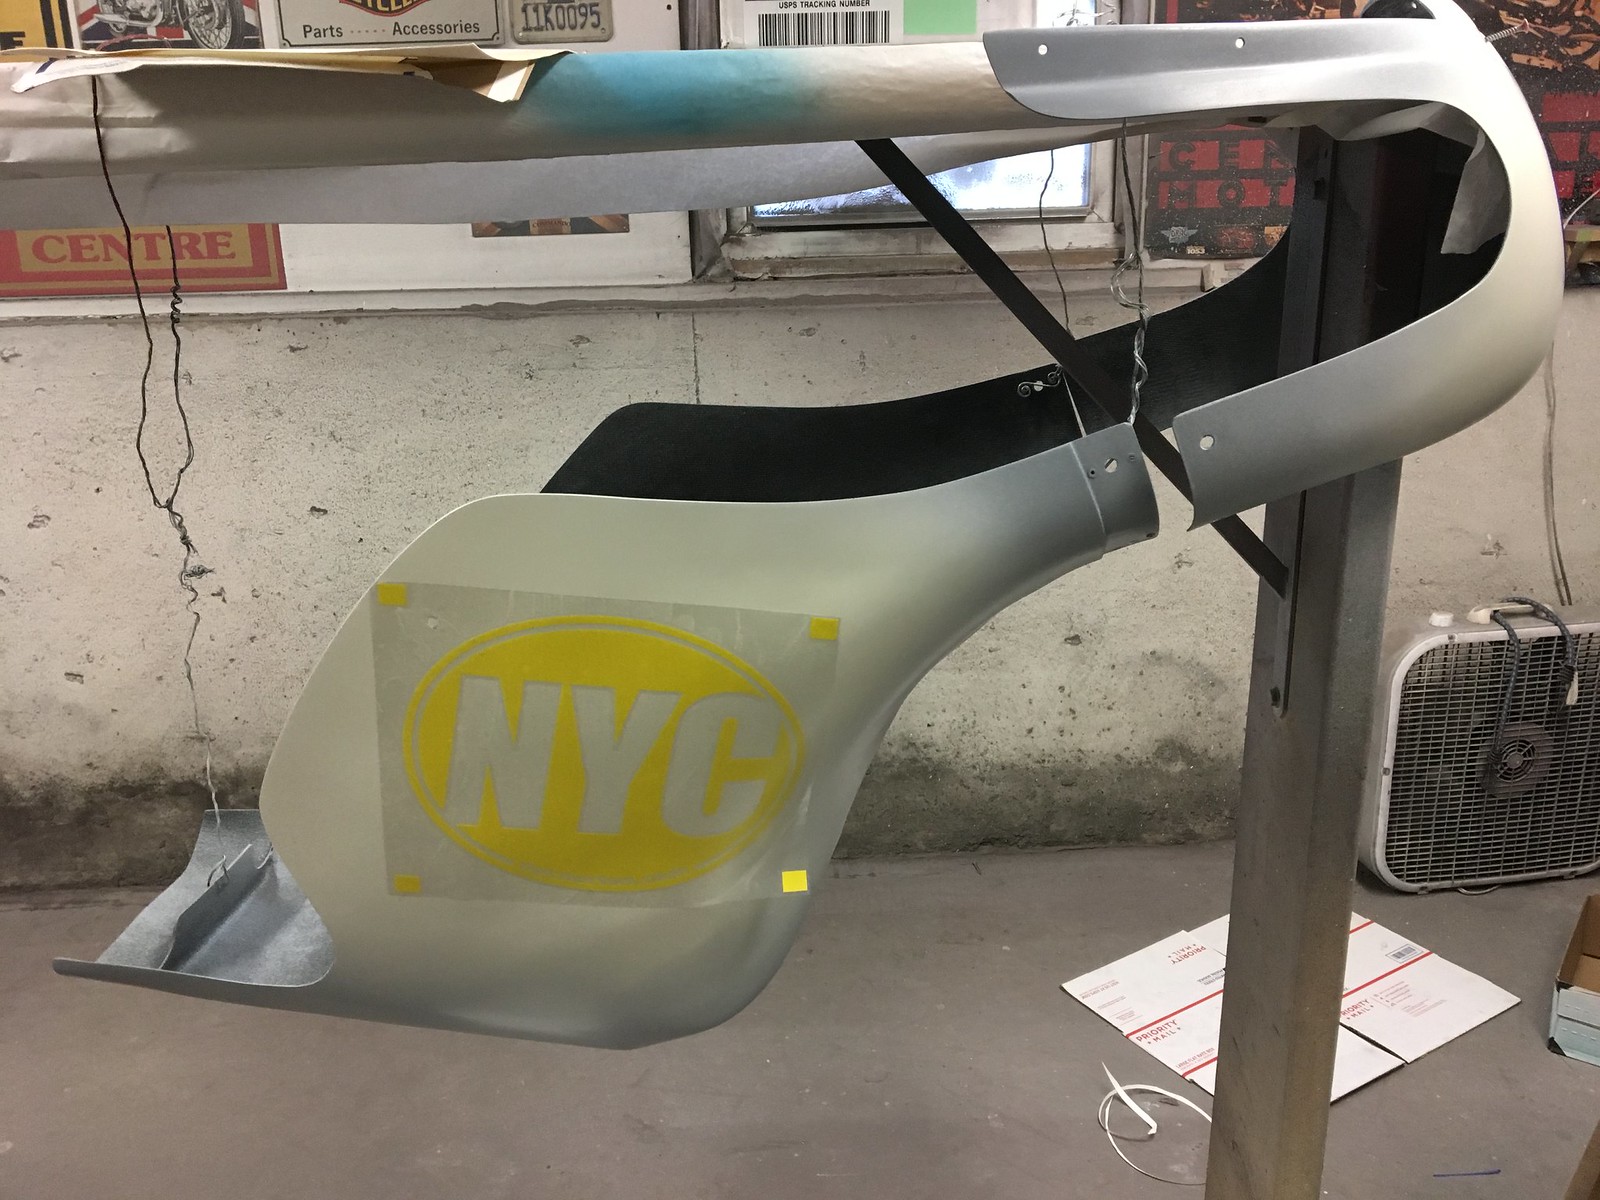
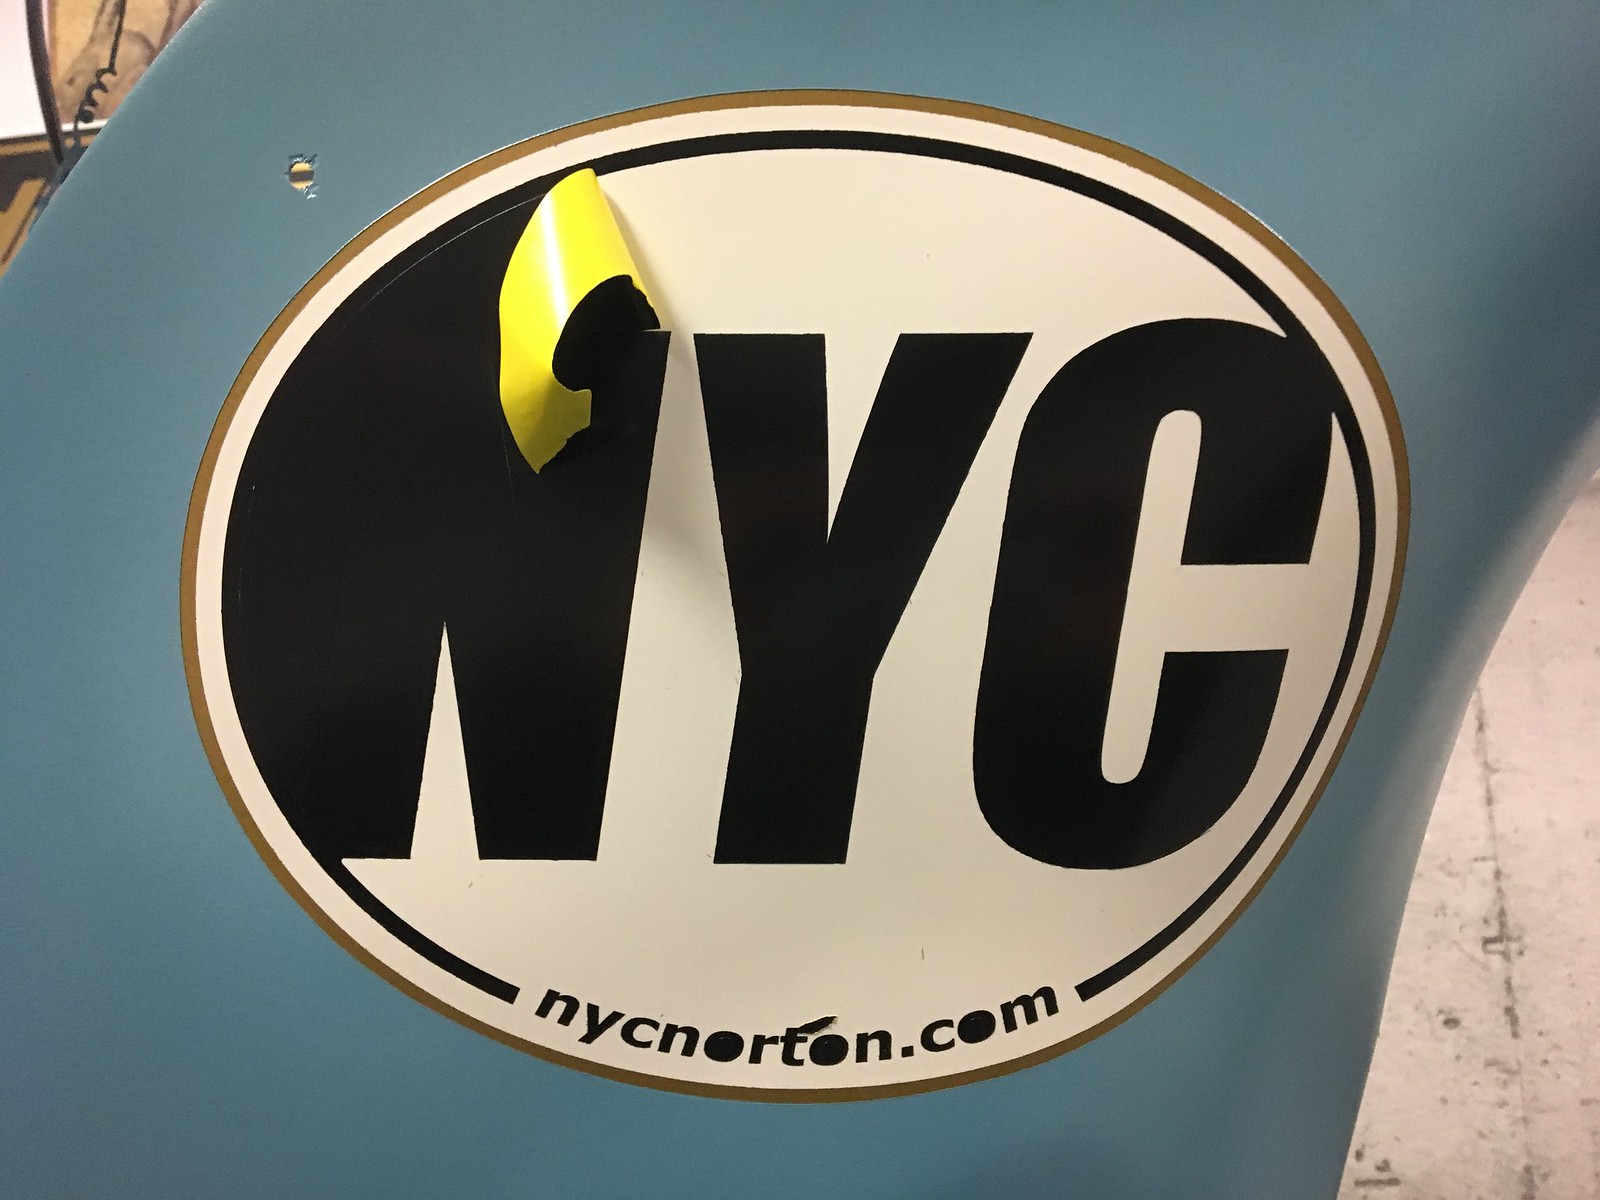
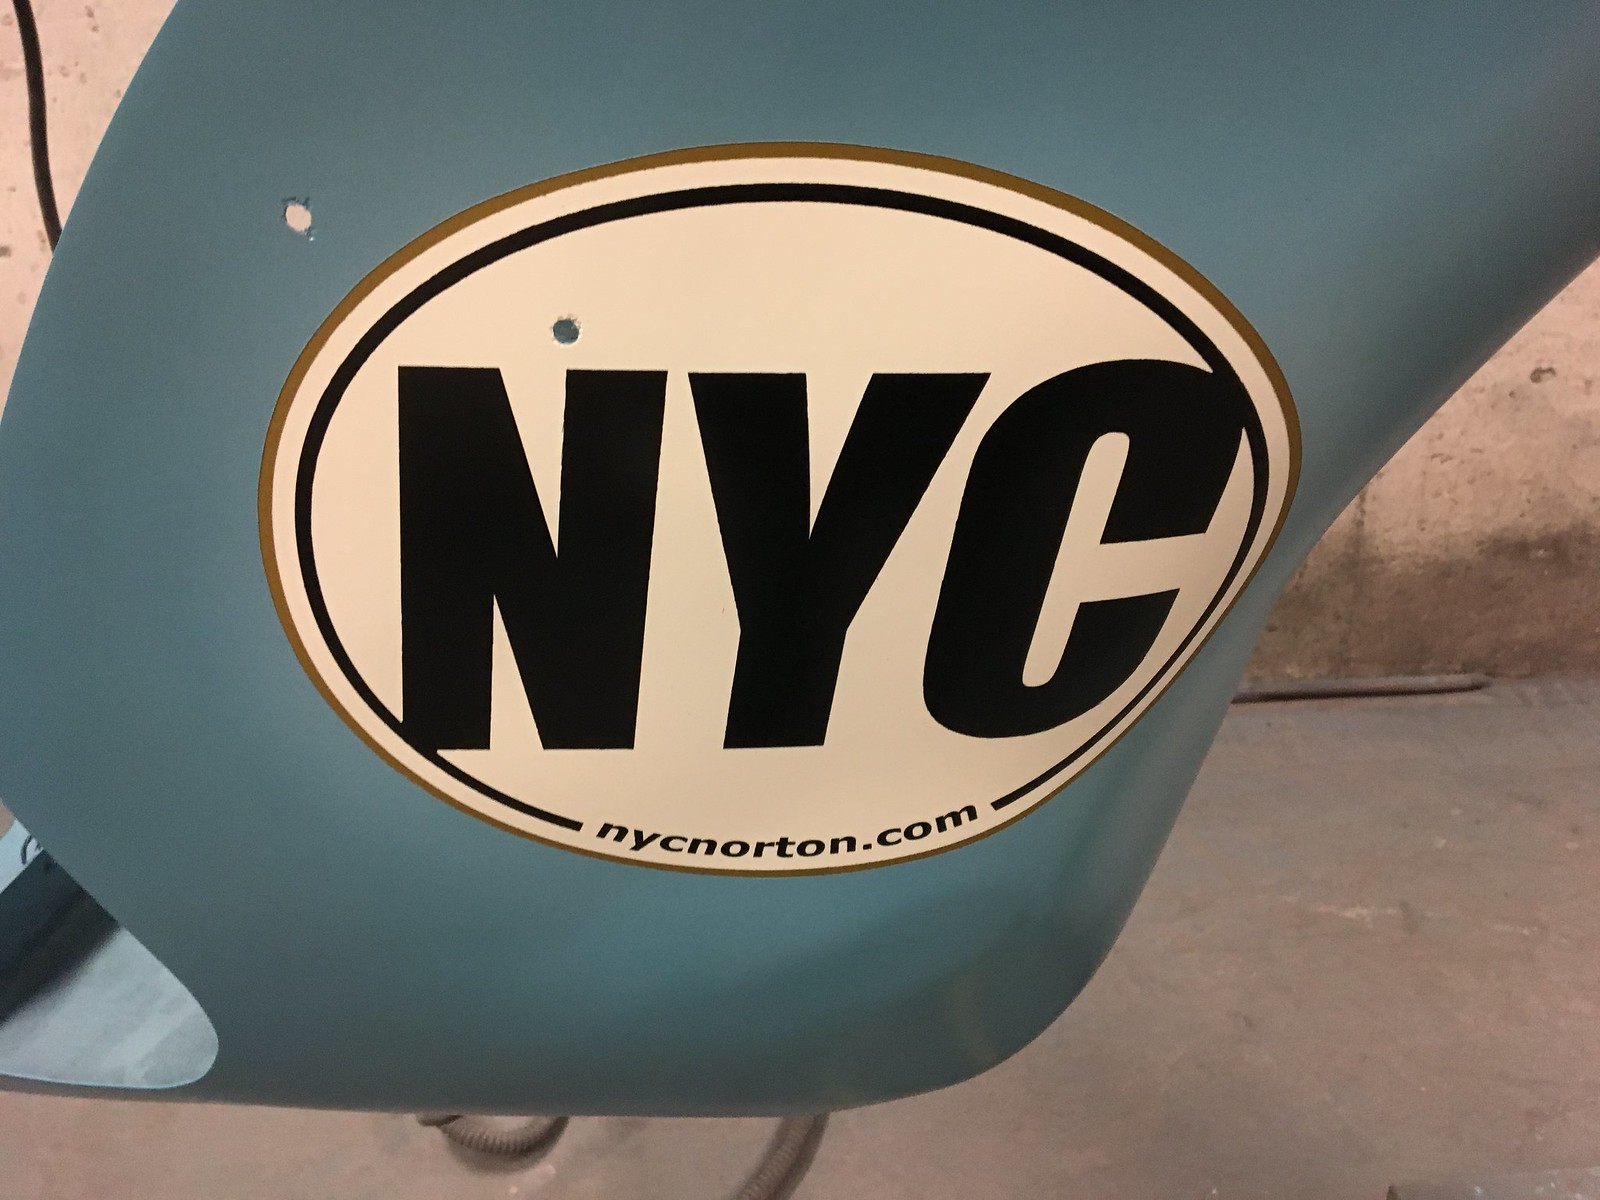
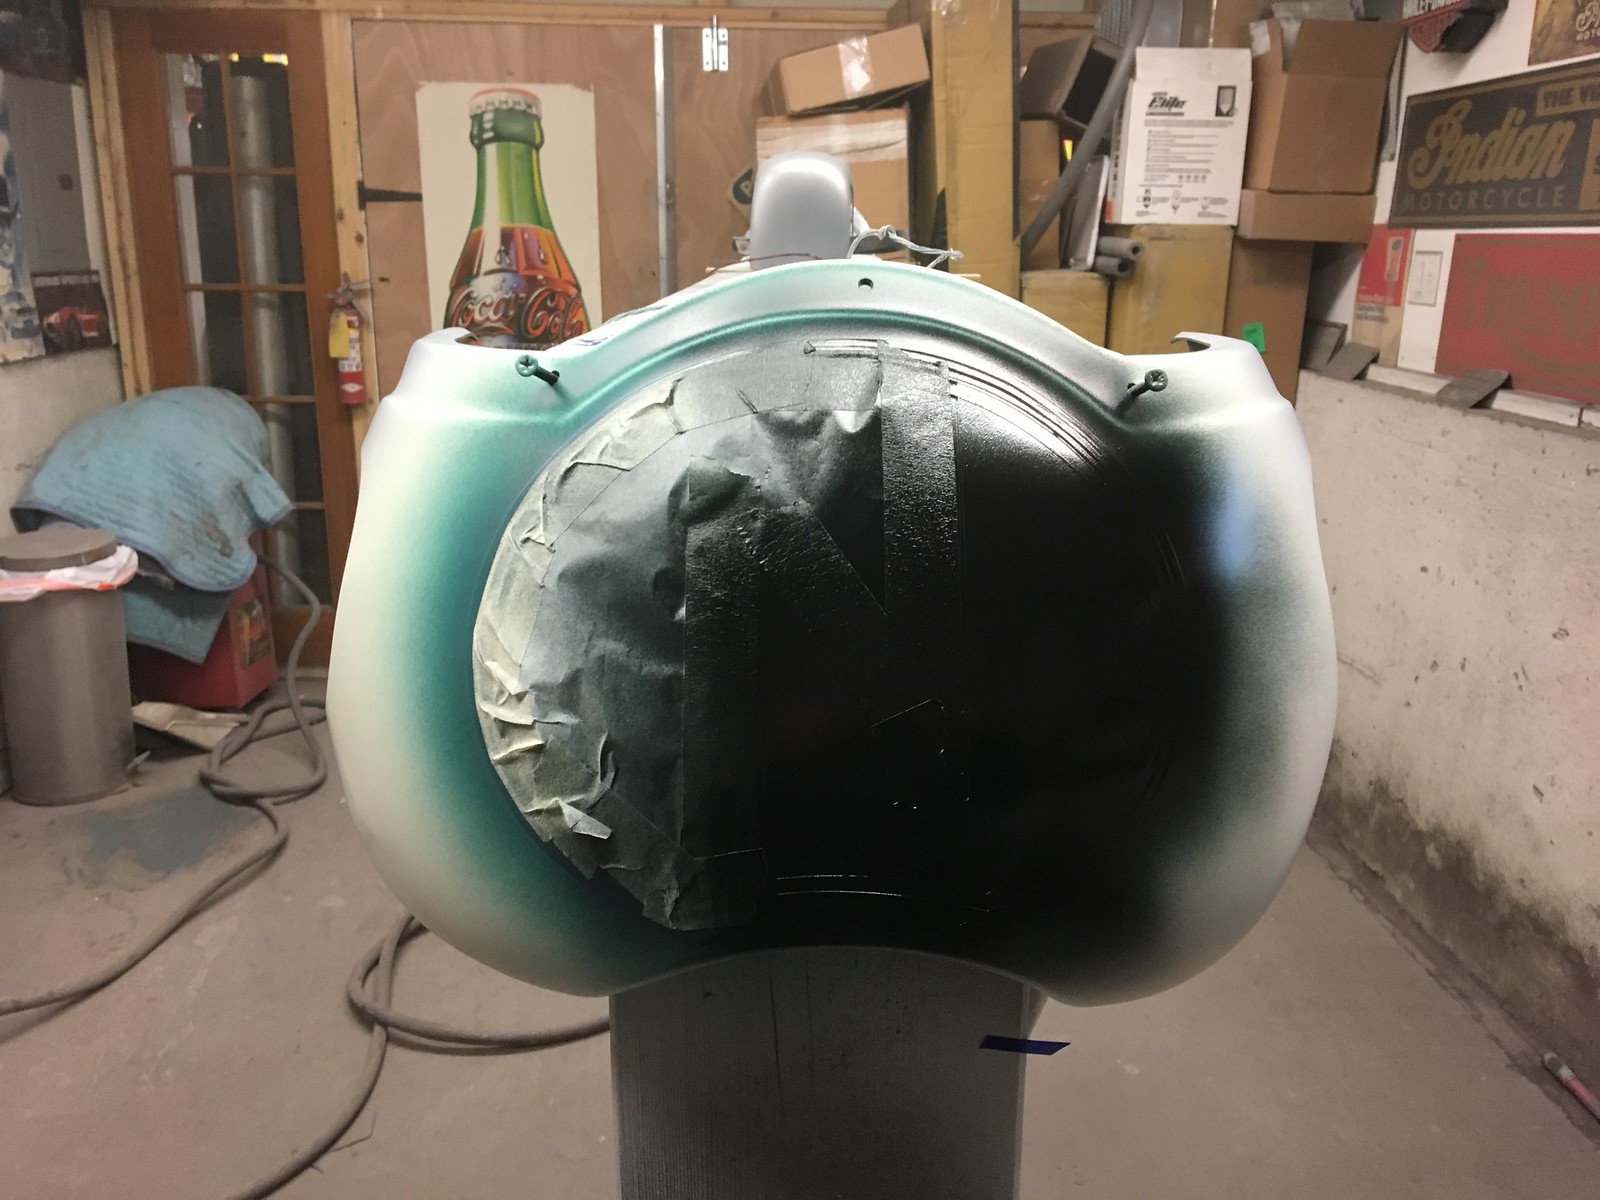
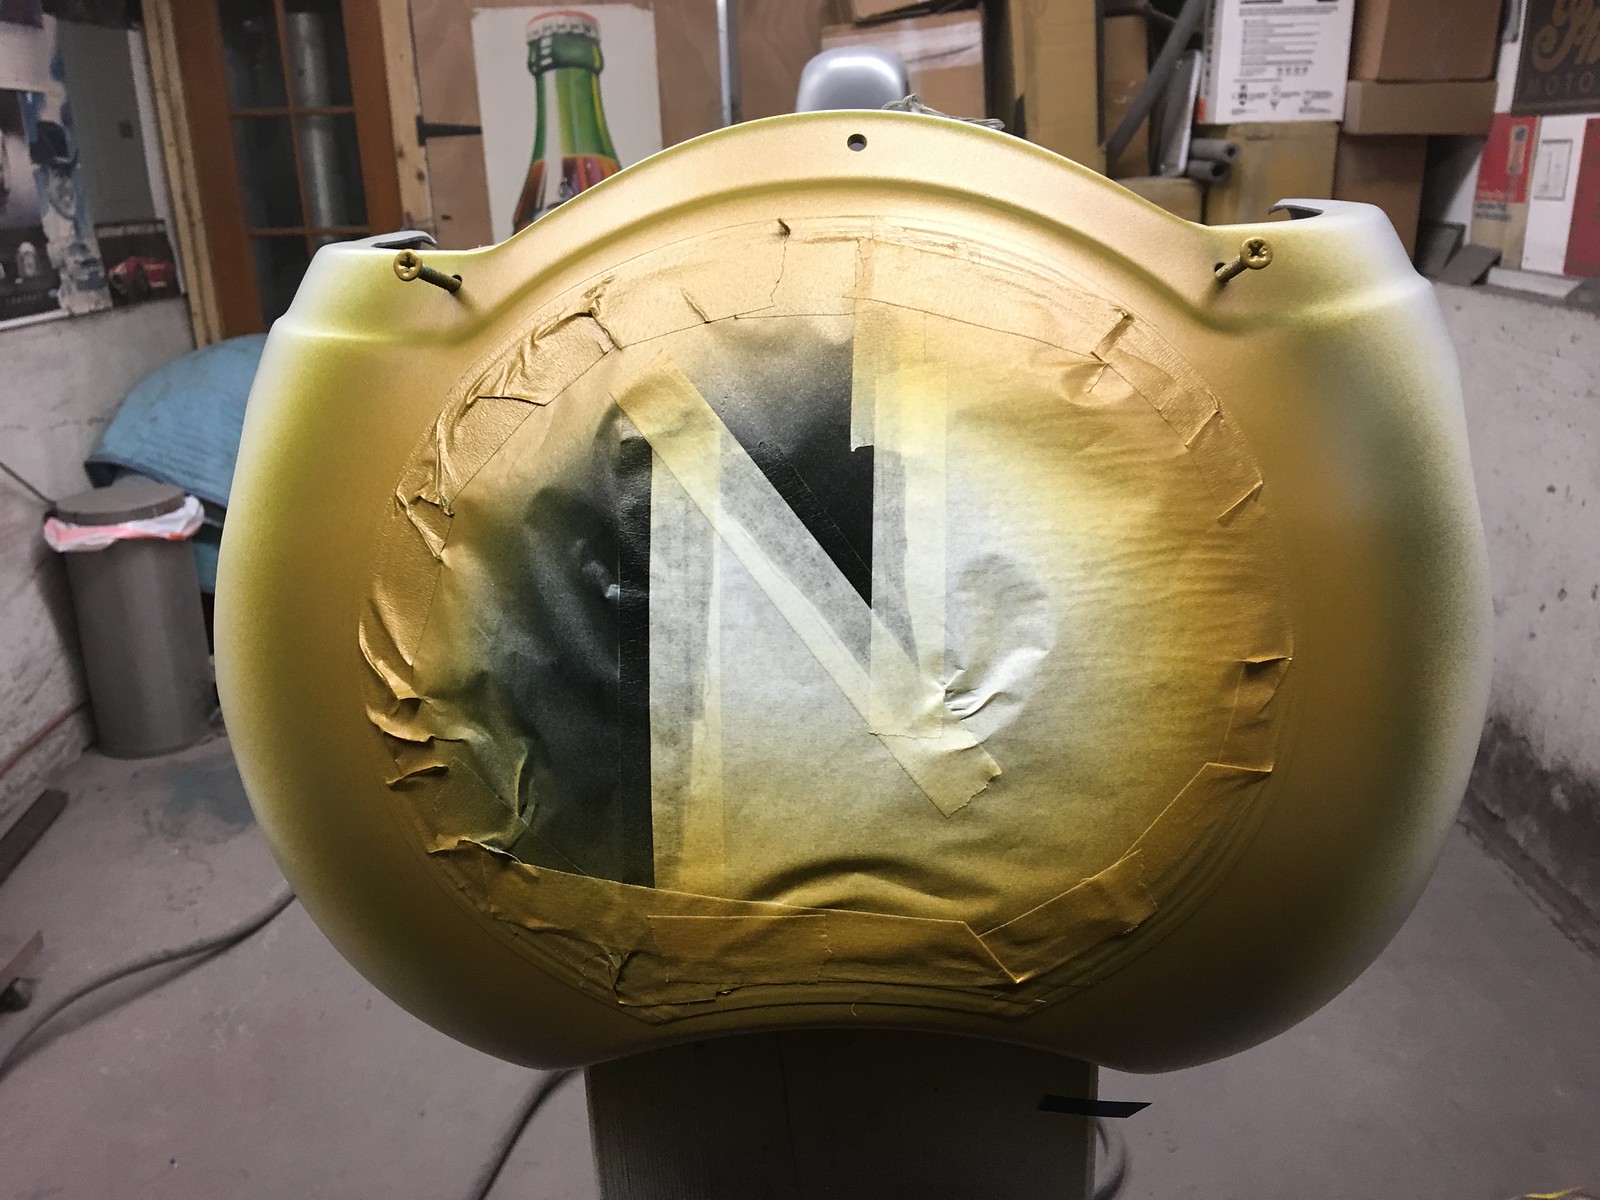
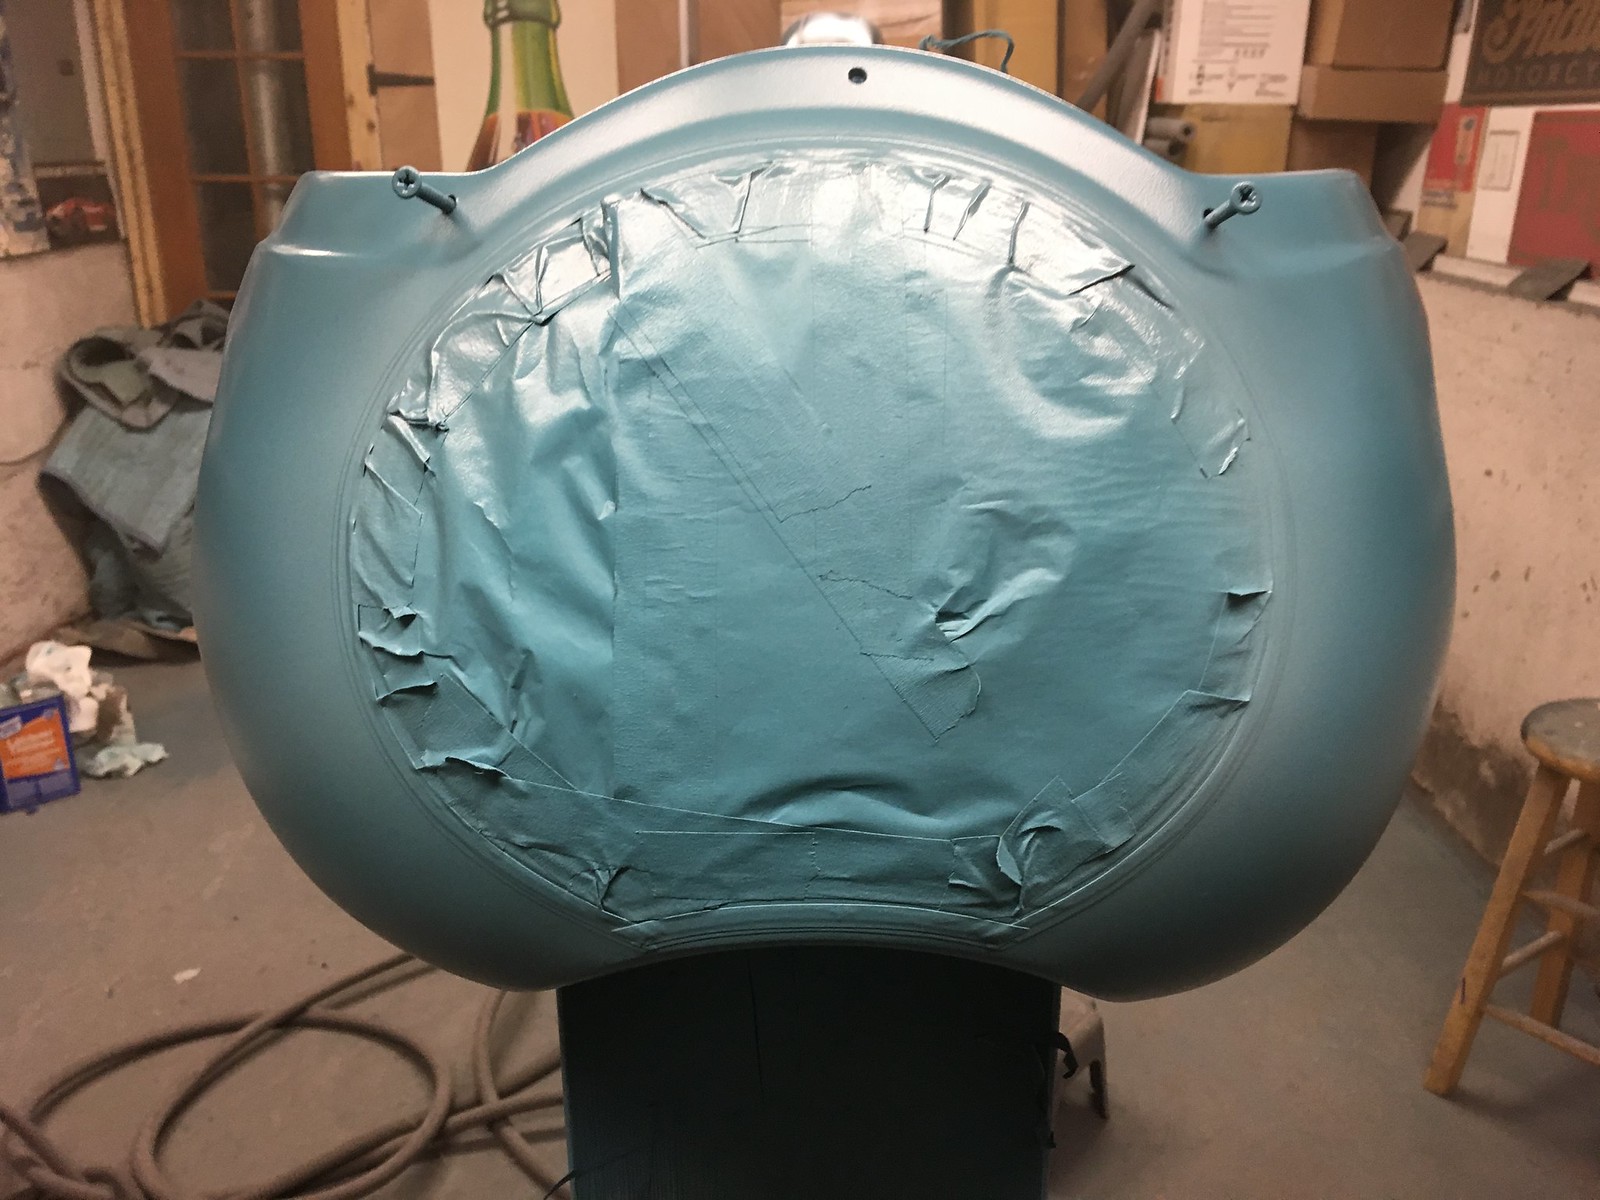
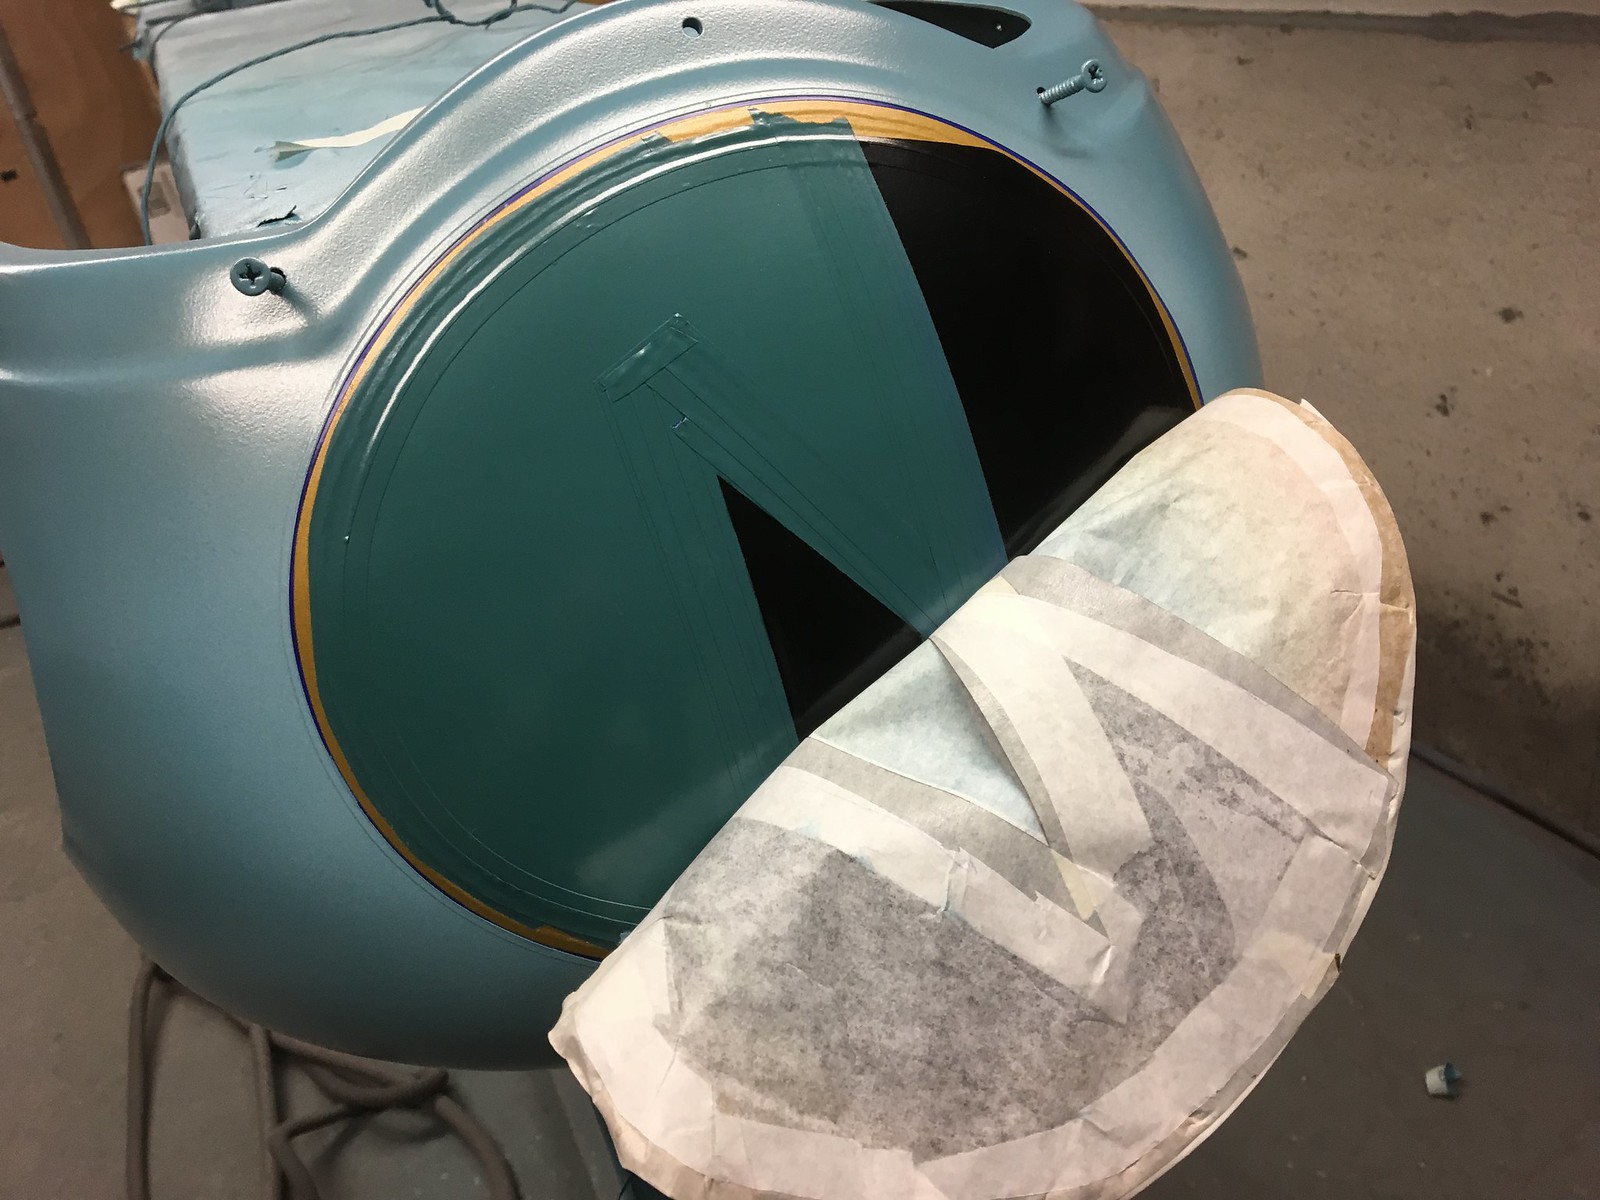
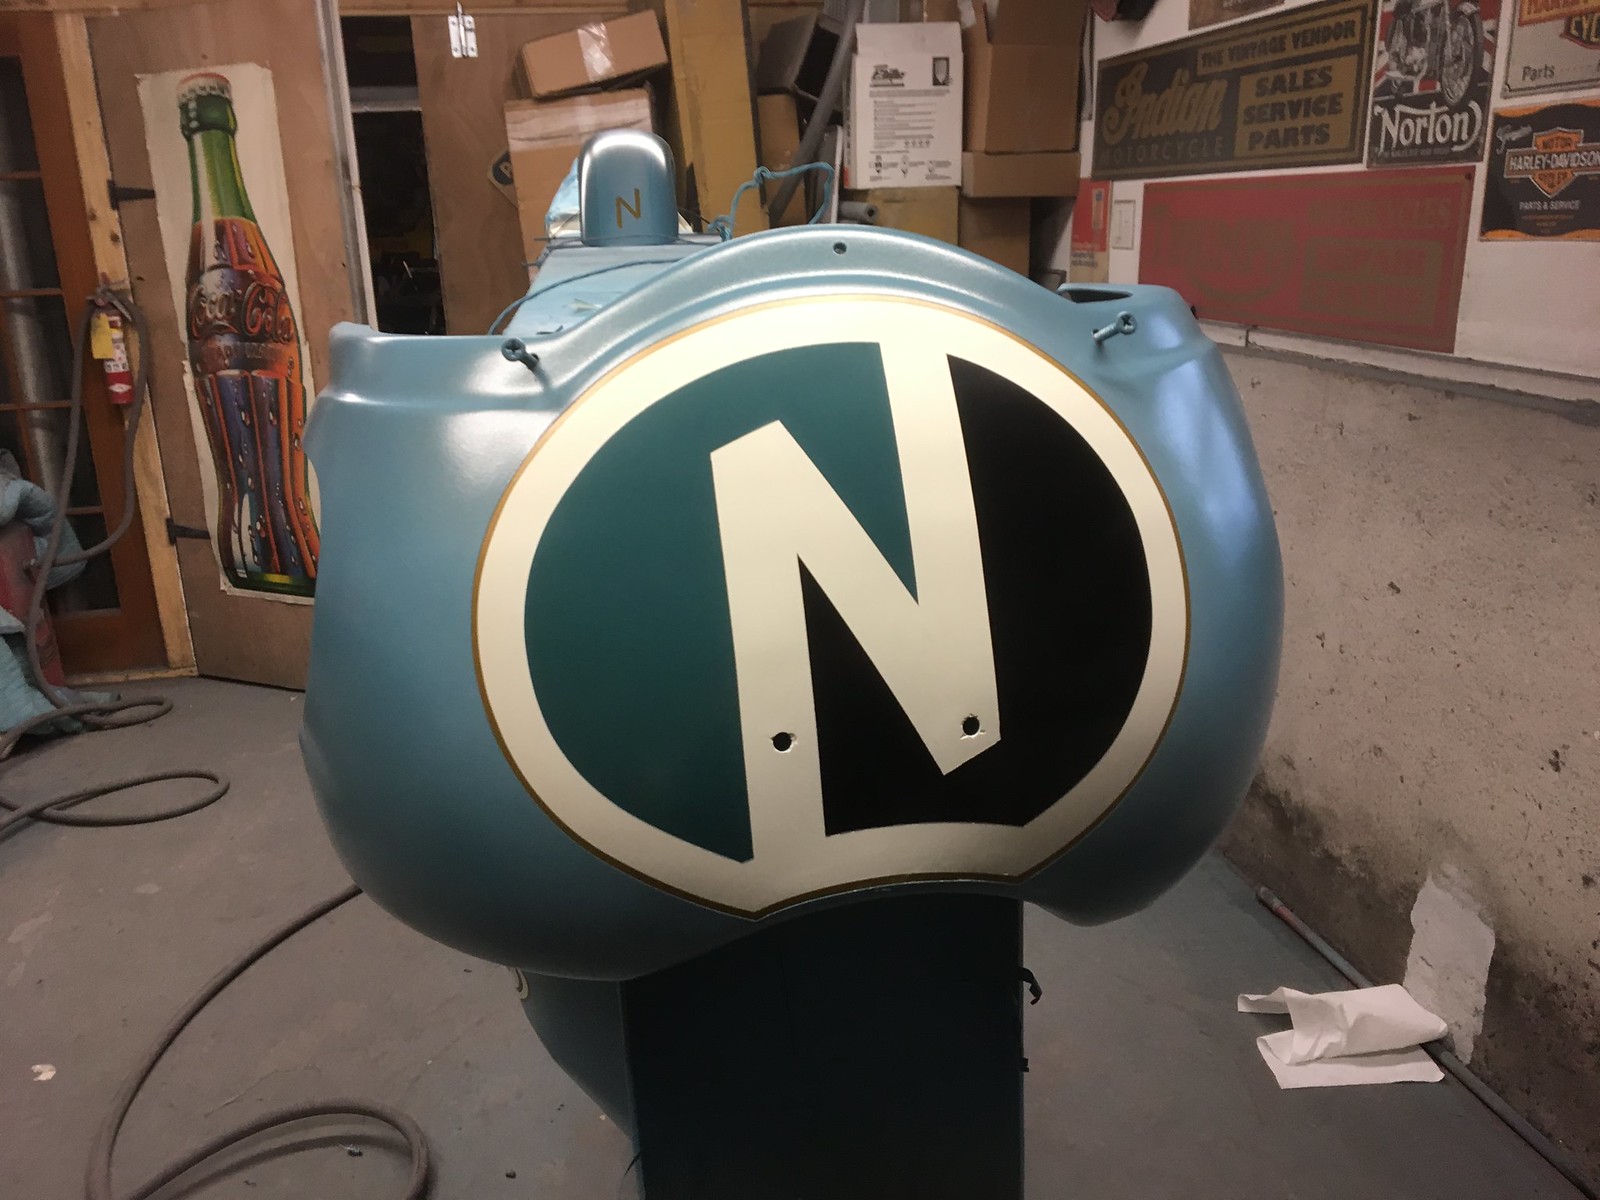
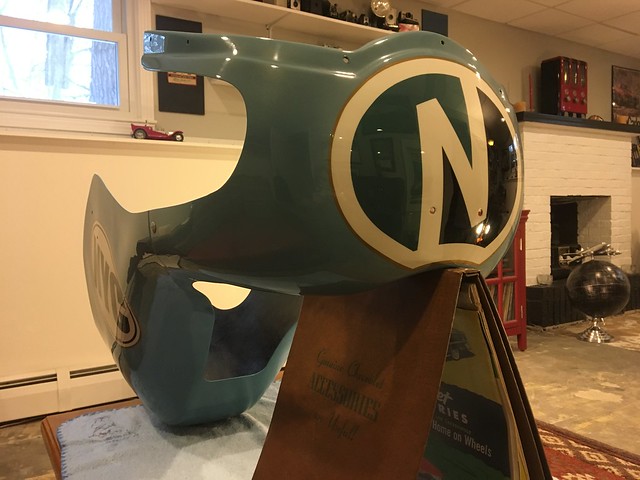
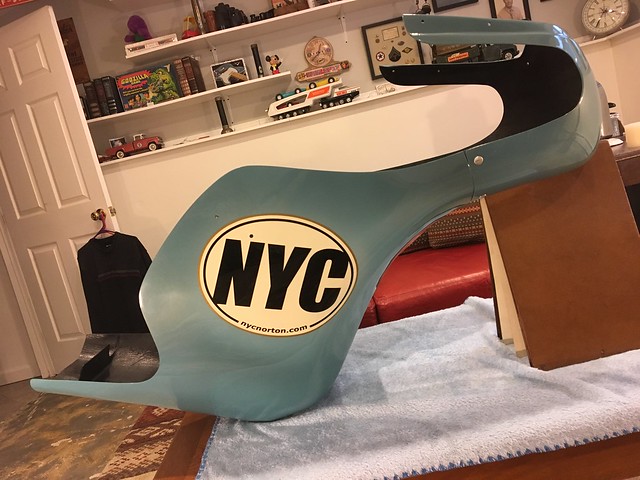
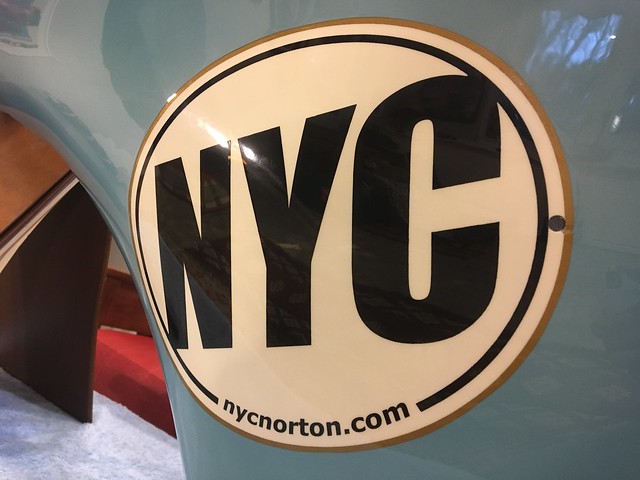
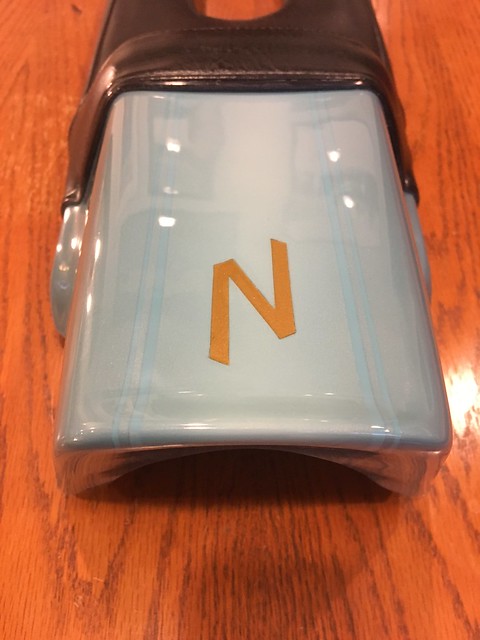
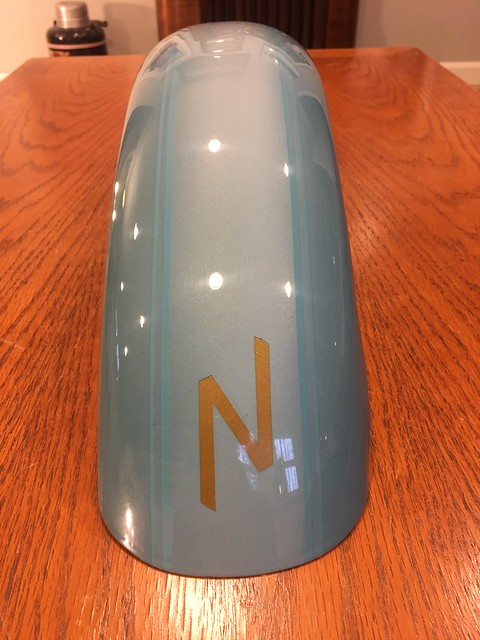
We then further added subtle shading, pinstripes on fender and tail, along with his signature “N” in gold on both, as well as a more elaborate “N” similar to his logo on the nose and NYC on the “roundels” on the fairing sides. And I got him to agree to some gold pearl over the top for some needed “flash”. In the end, I believe the effect is elegant and understated. It also is difficult to capture in pictures as the effects, while subtle, change in different lighting. Something my old boss Bob Burke was really fond of. I guess it must have stuck with me all these decades later. 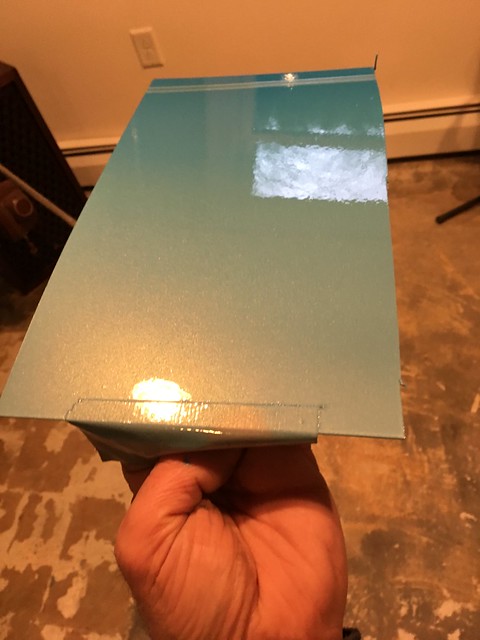
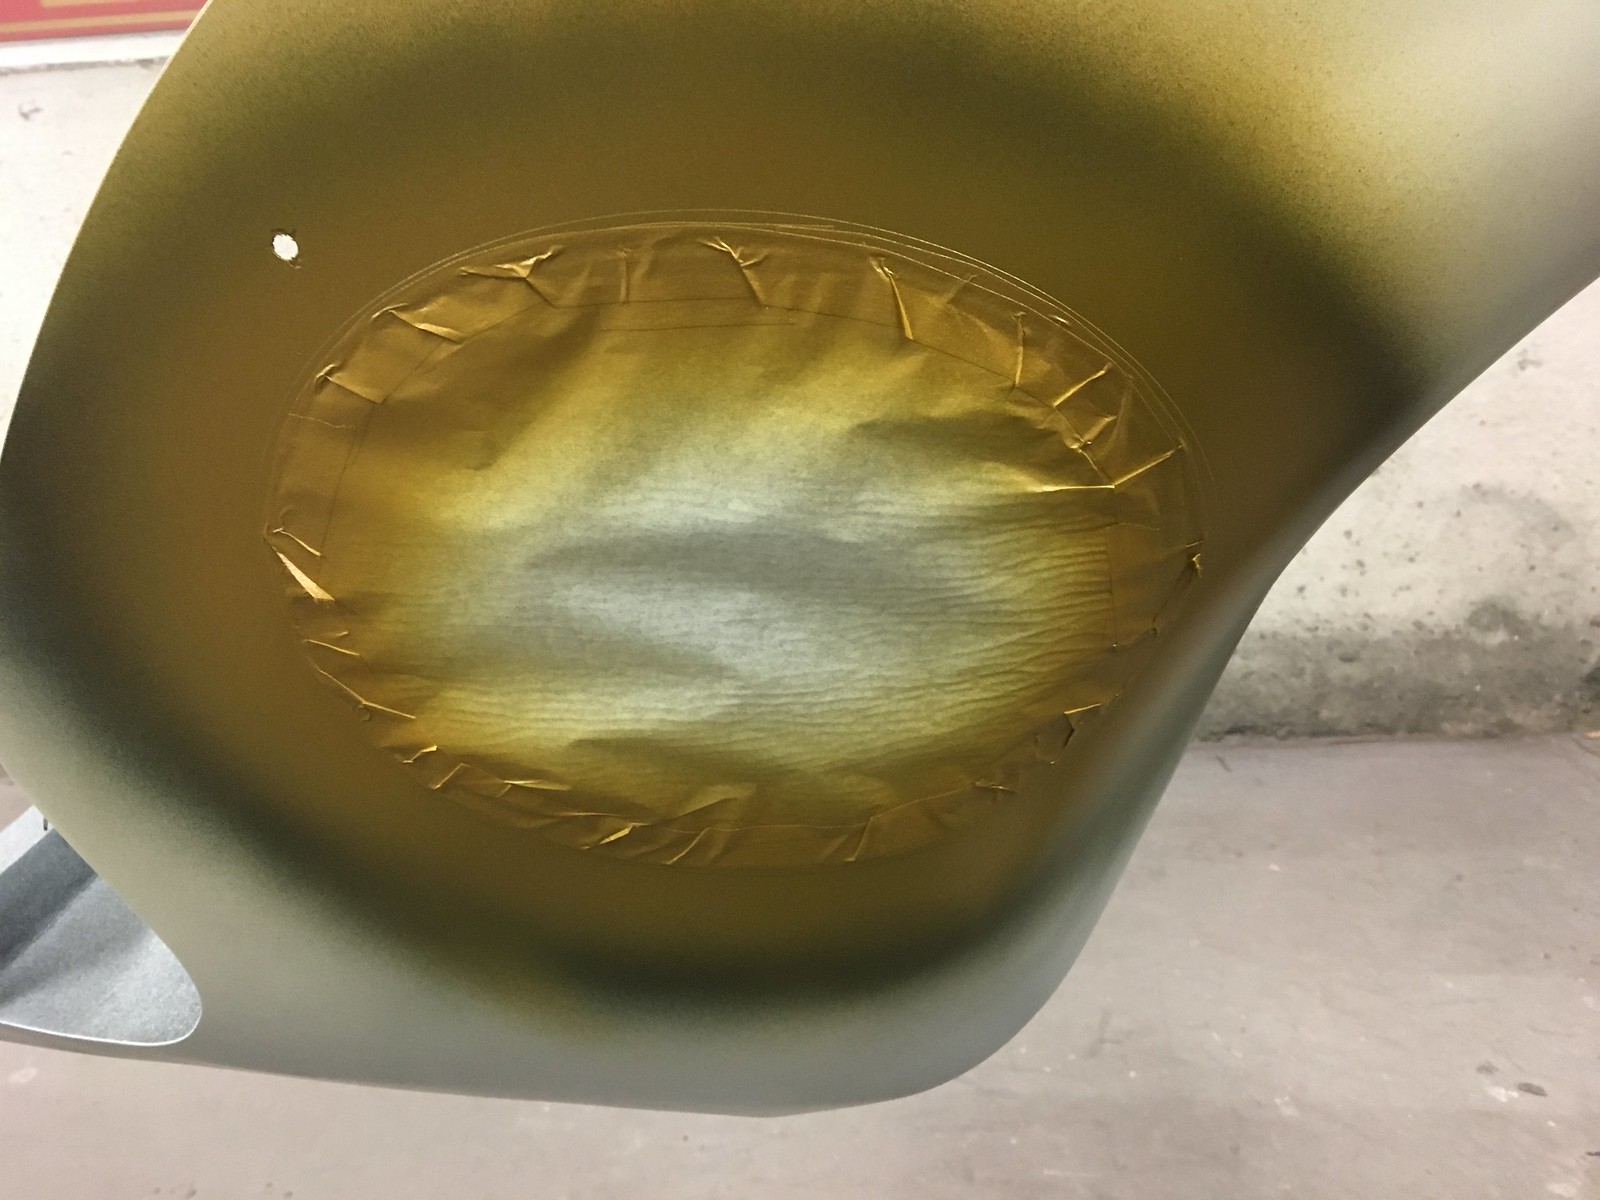
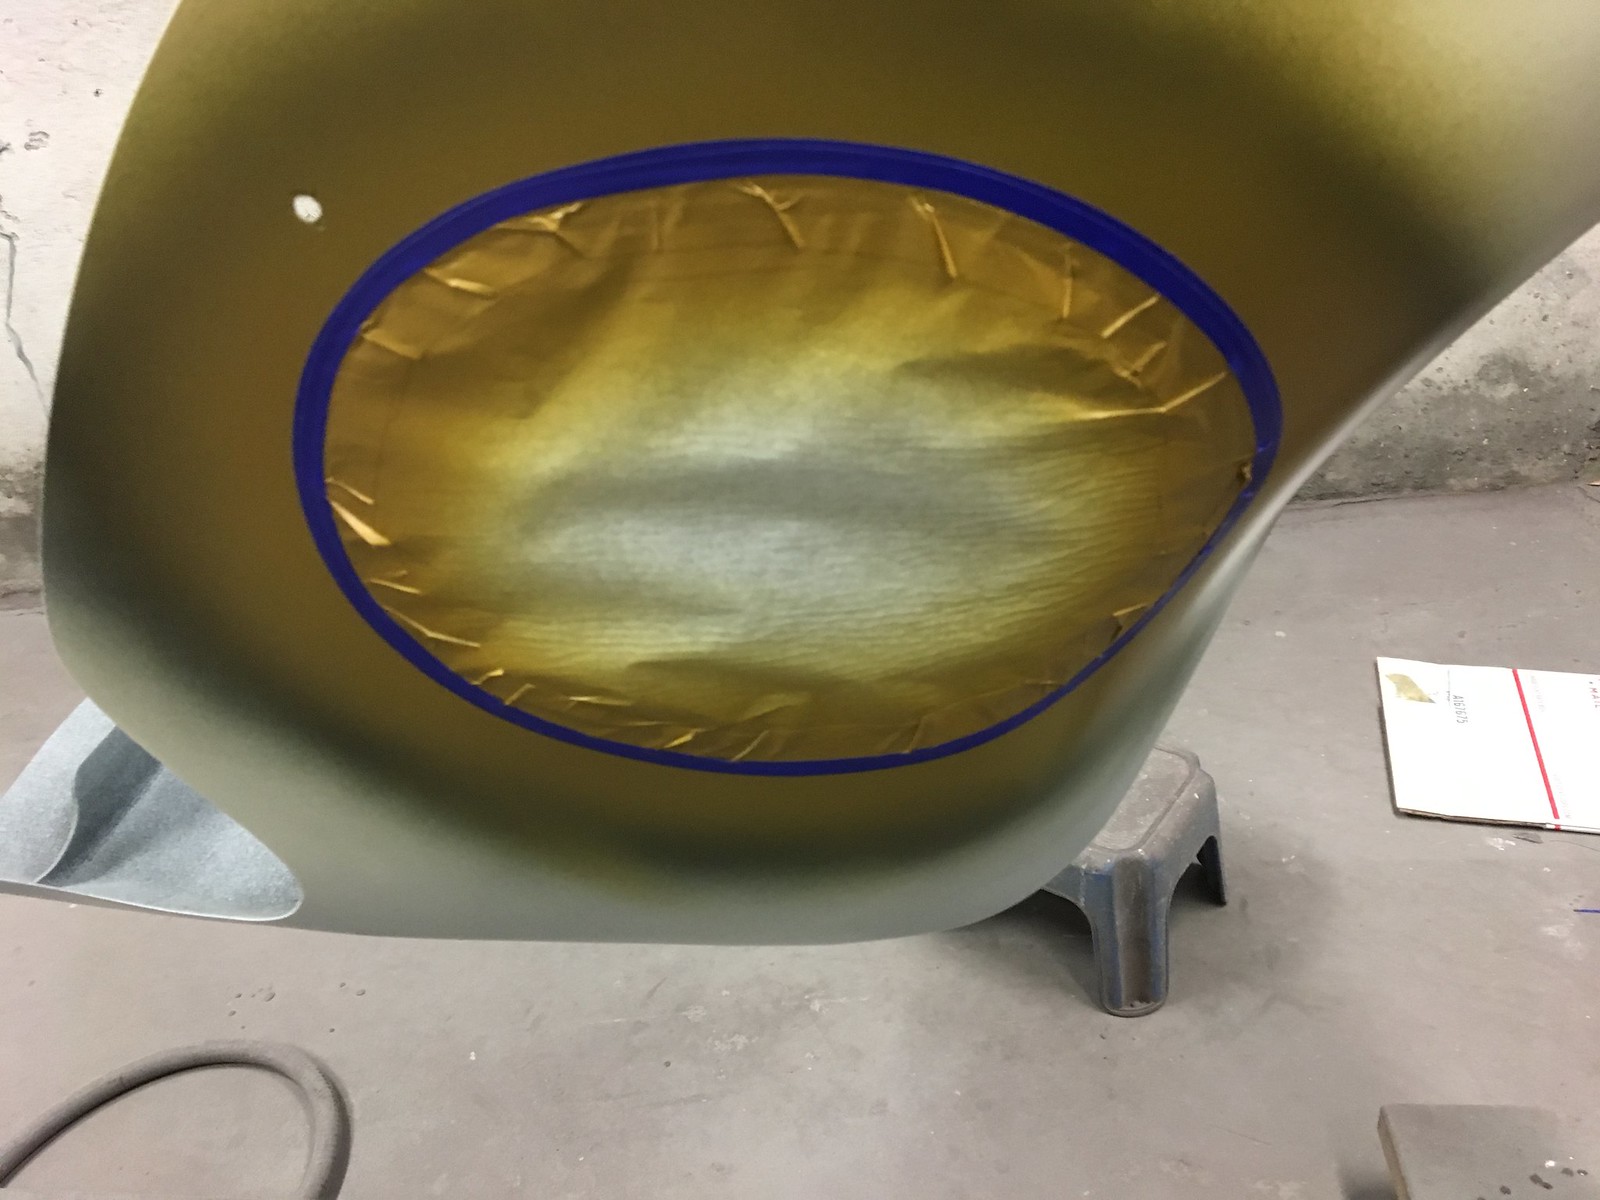
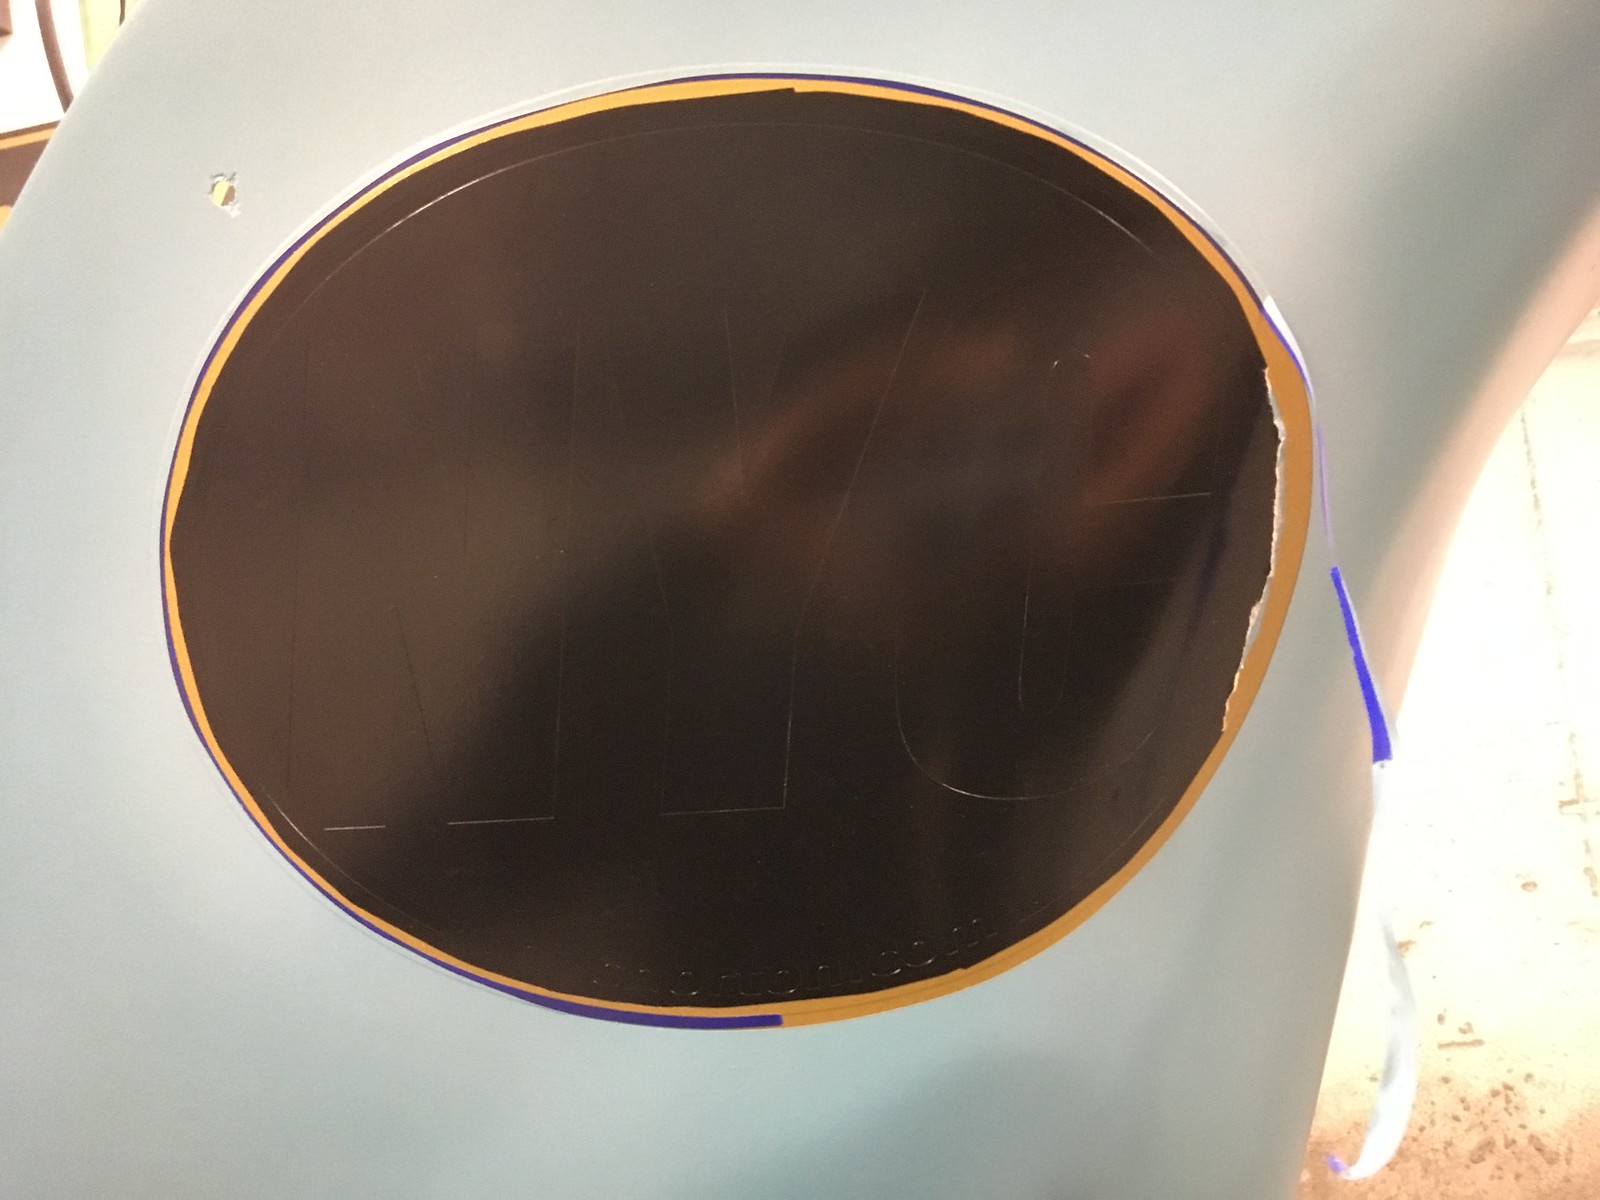
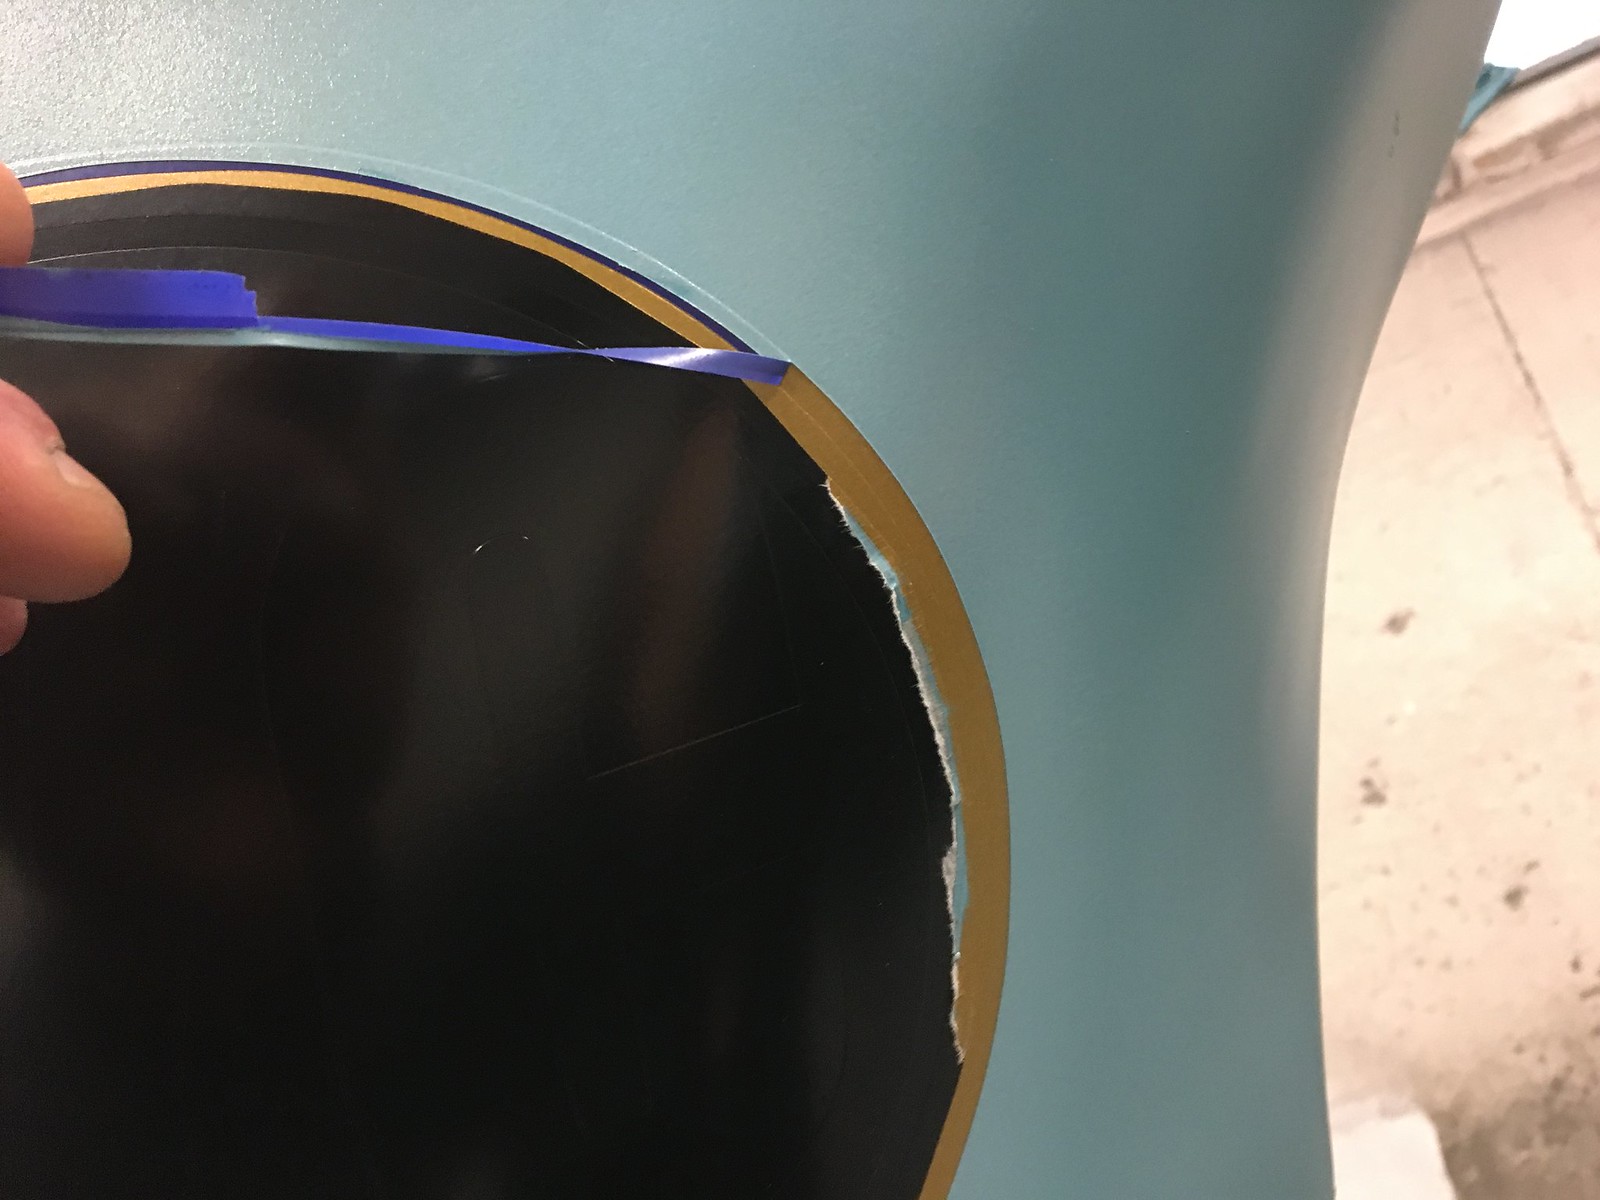
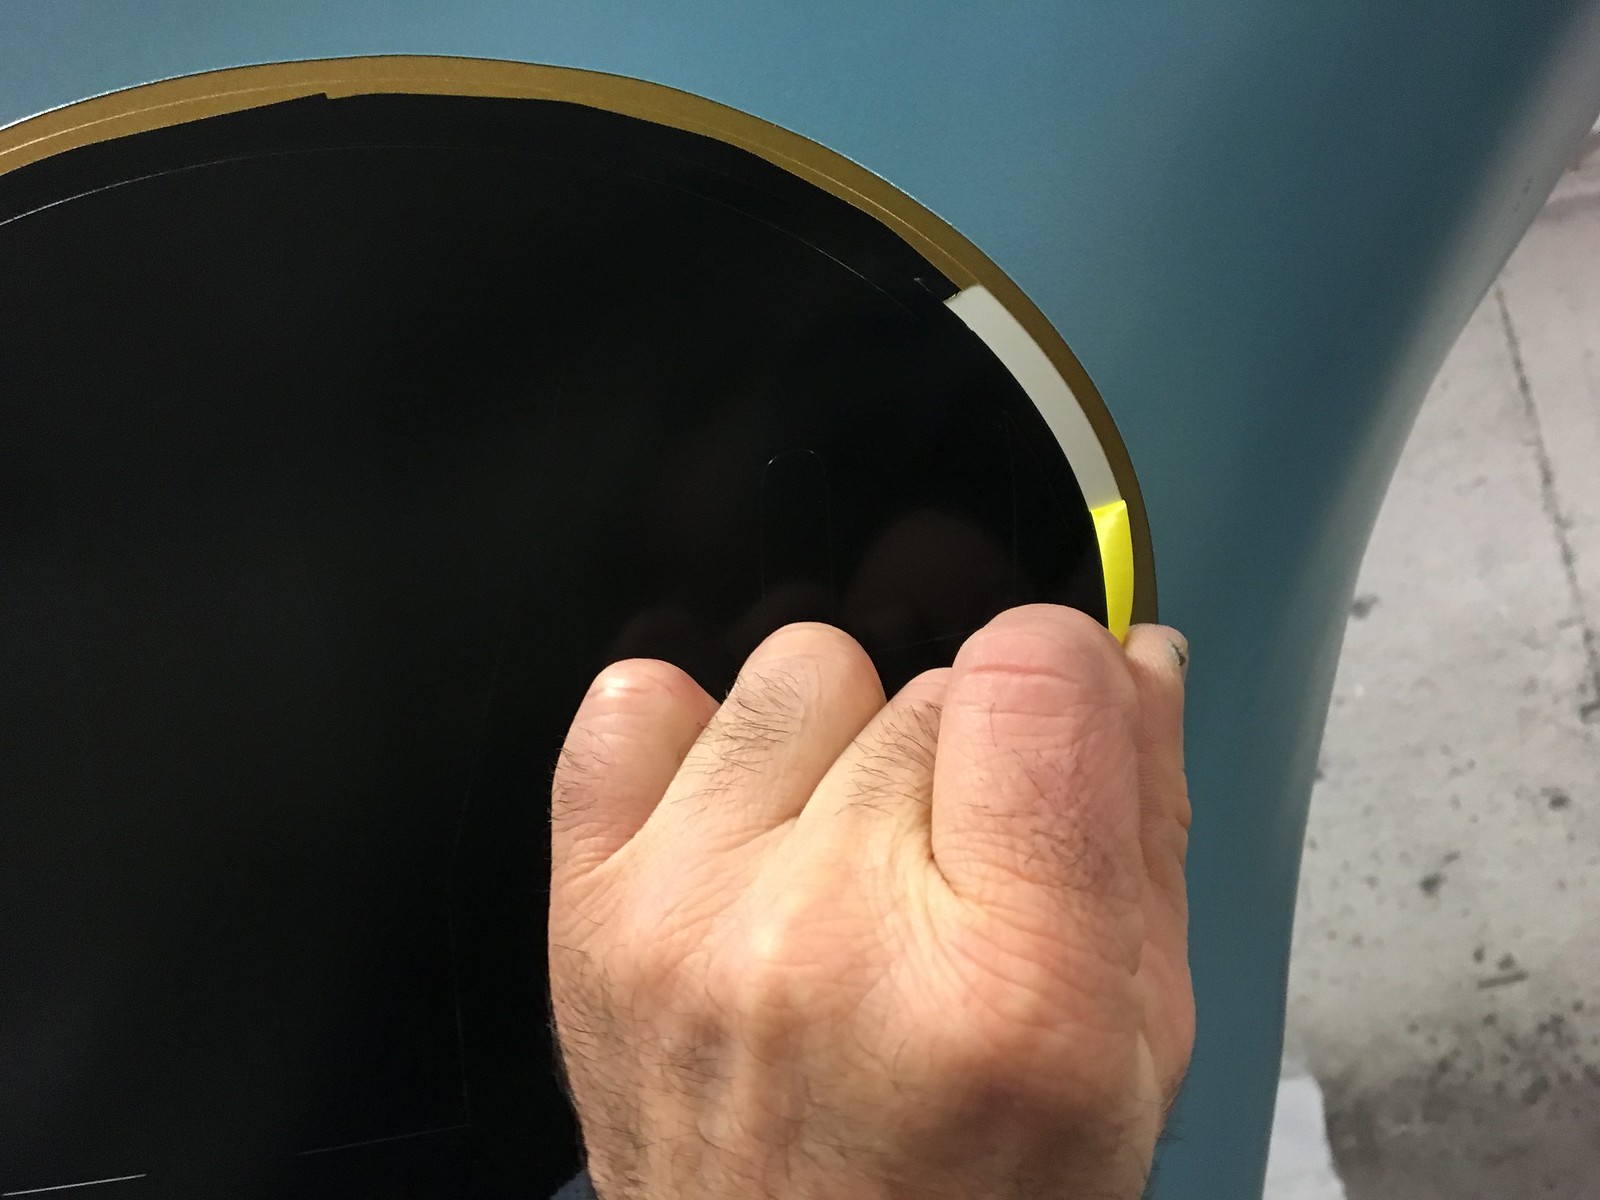
Laying out and spraying the “roundels” below in basecoat before clearing –


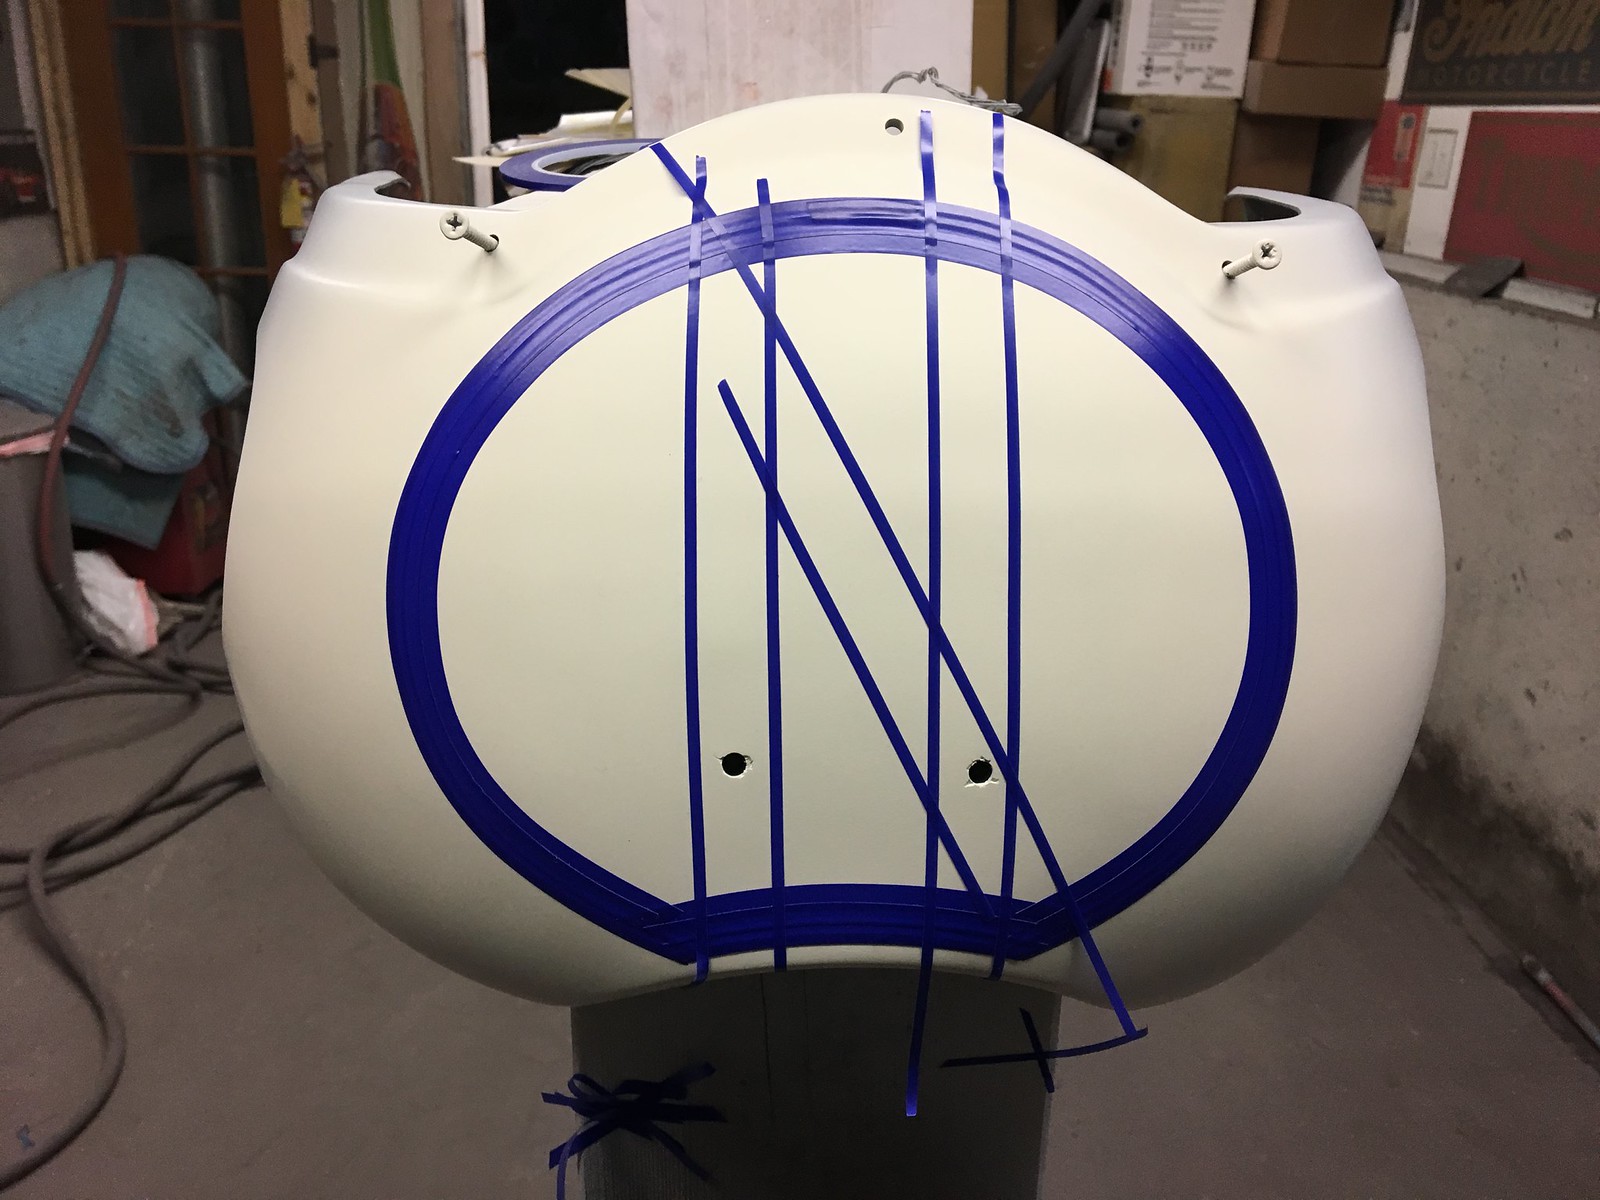
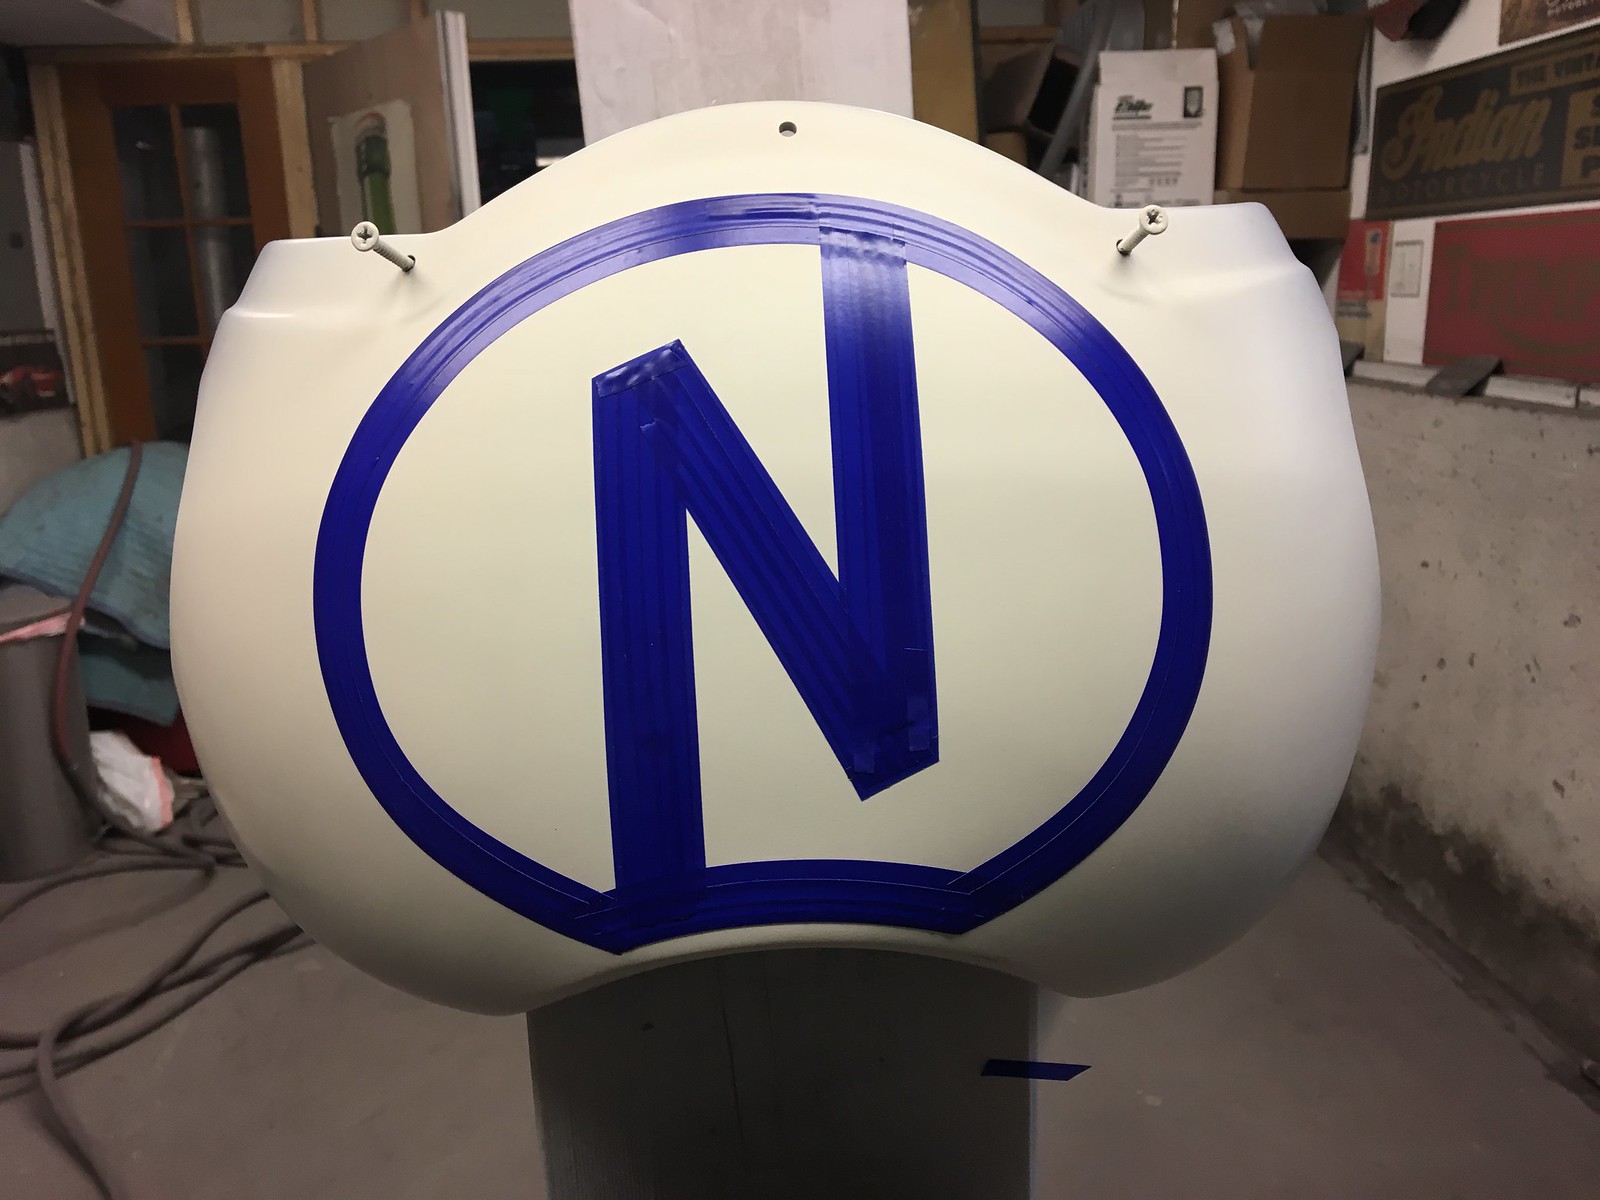
Nosepiece “N” logo layout –


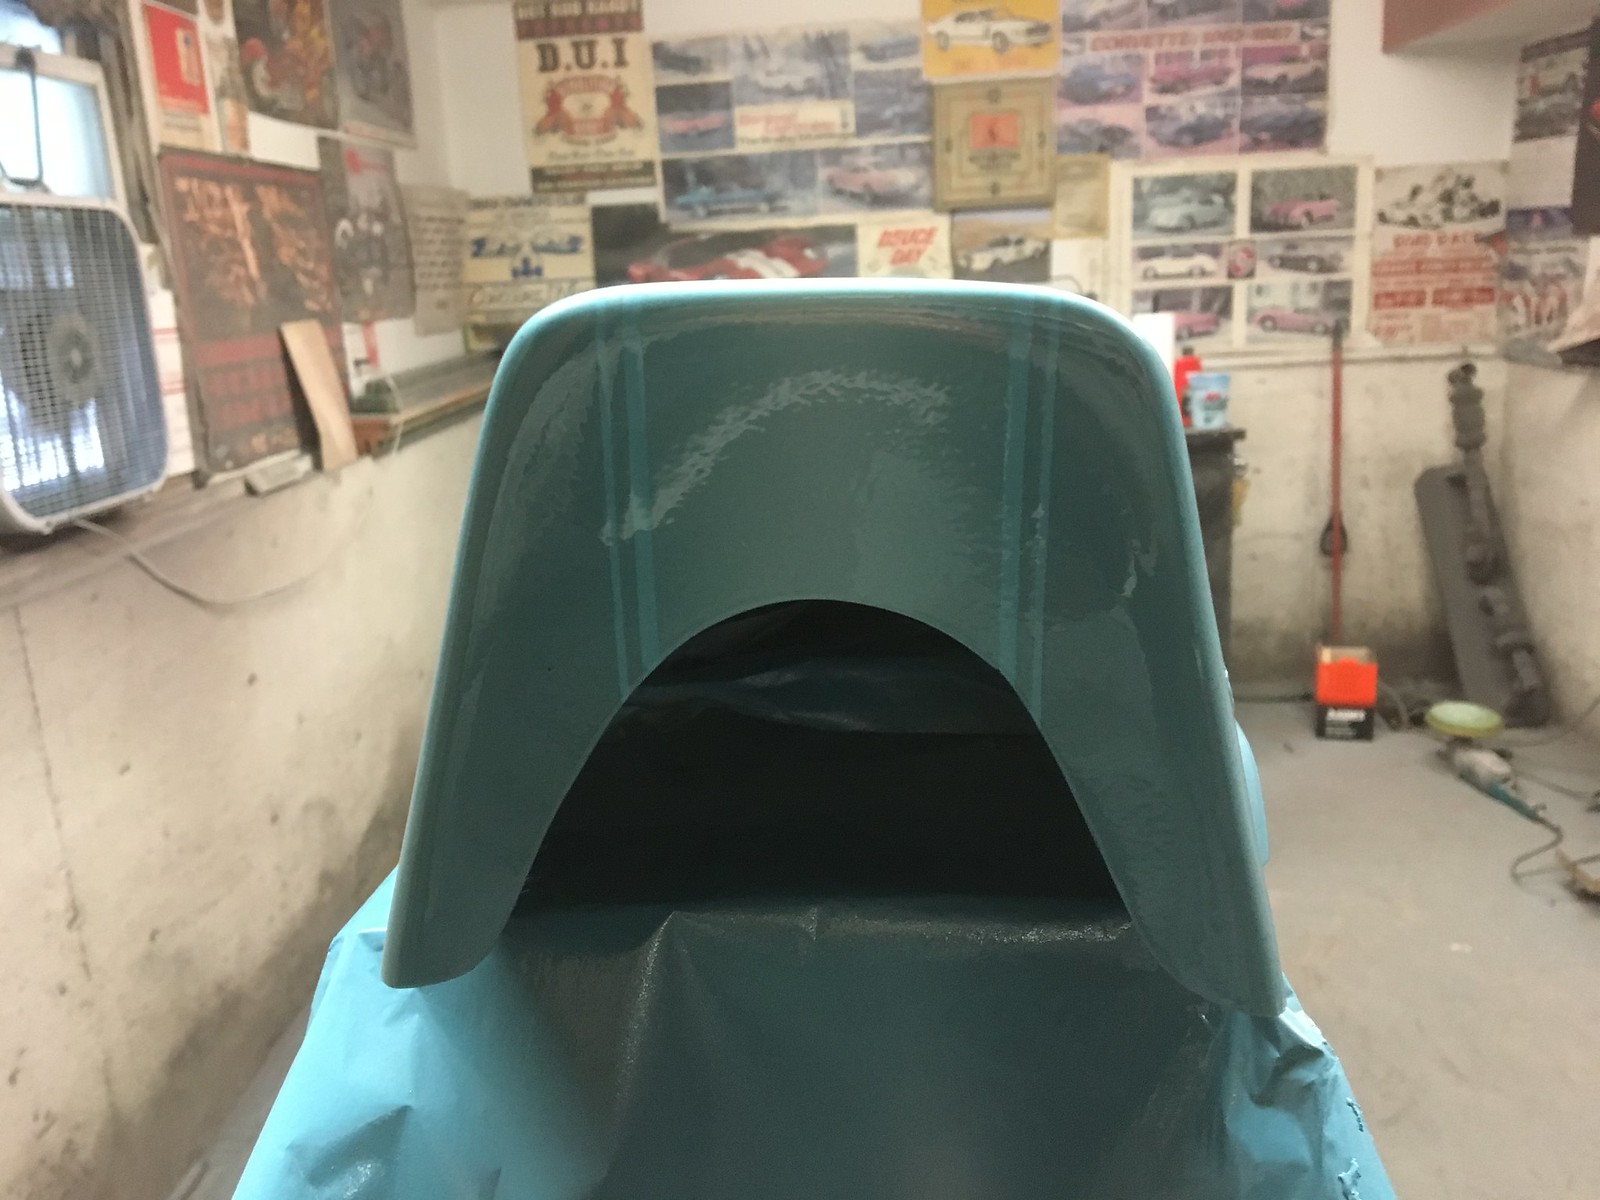
Ready for clear –
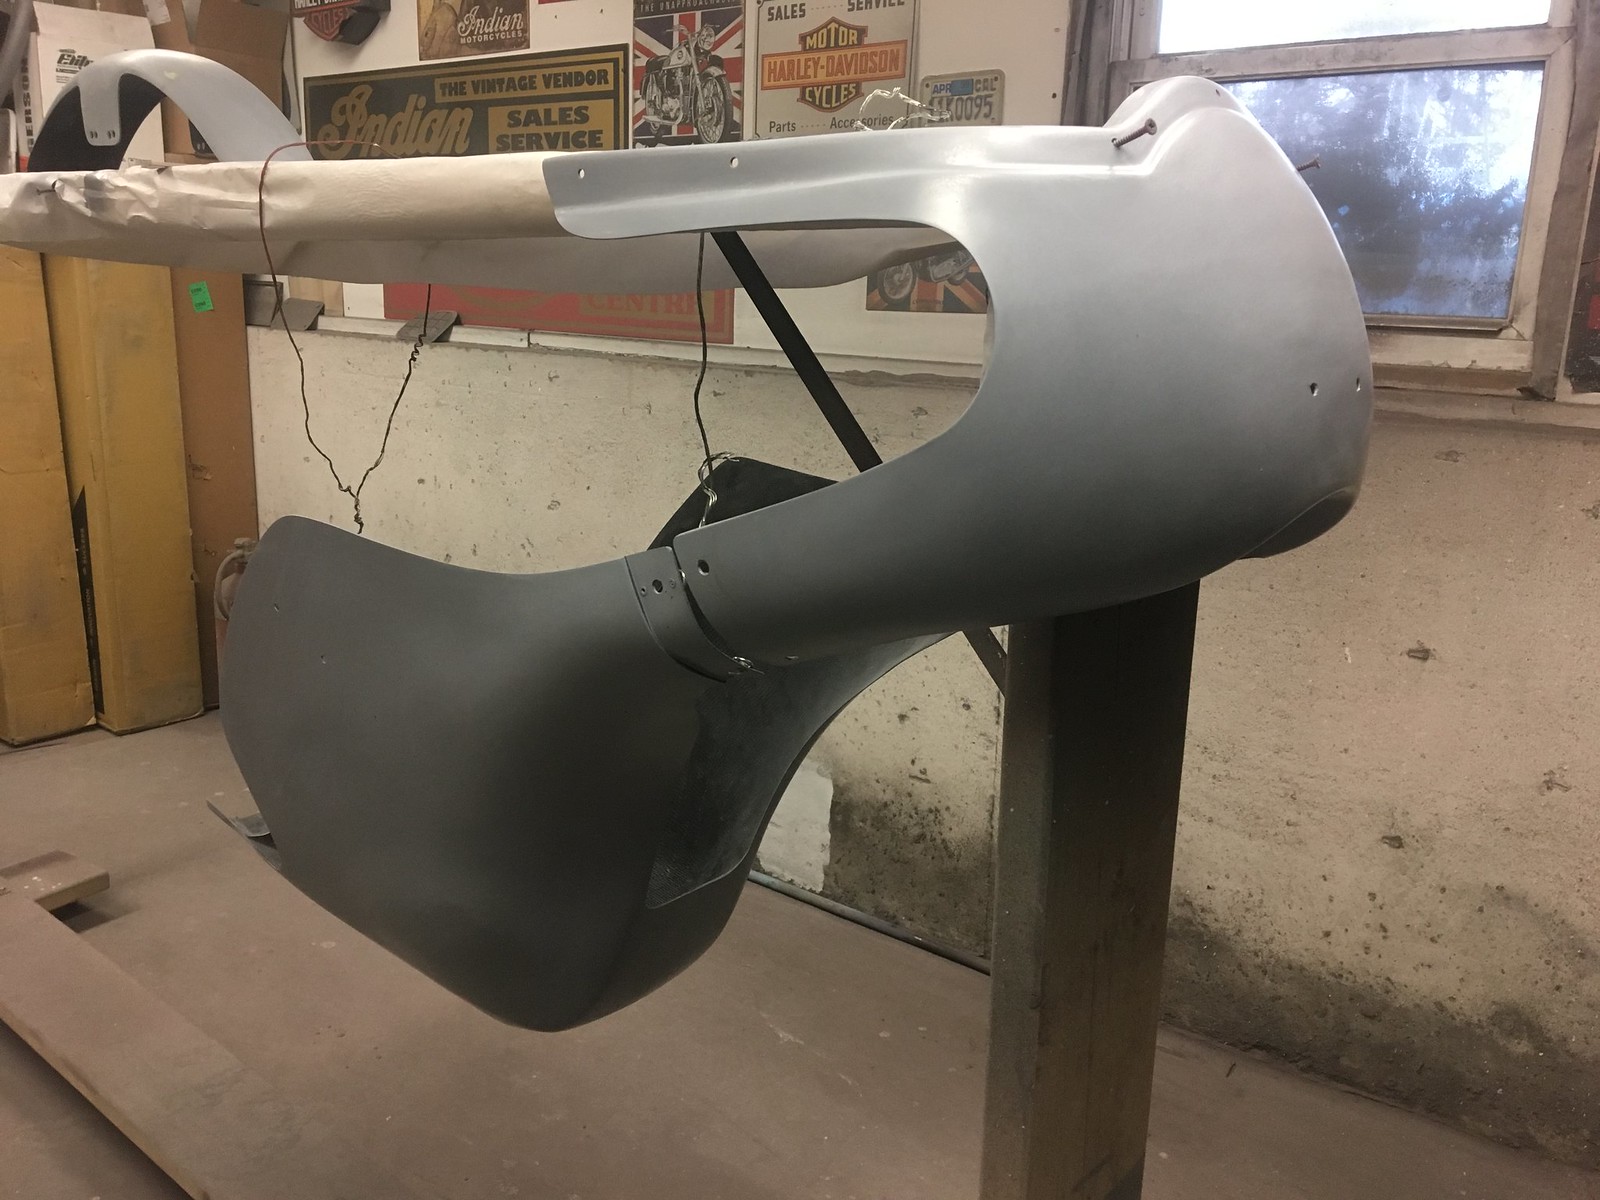
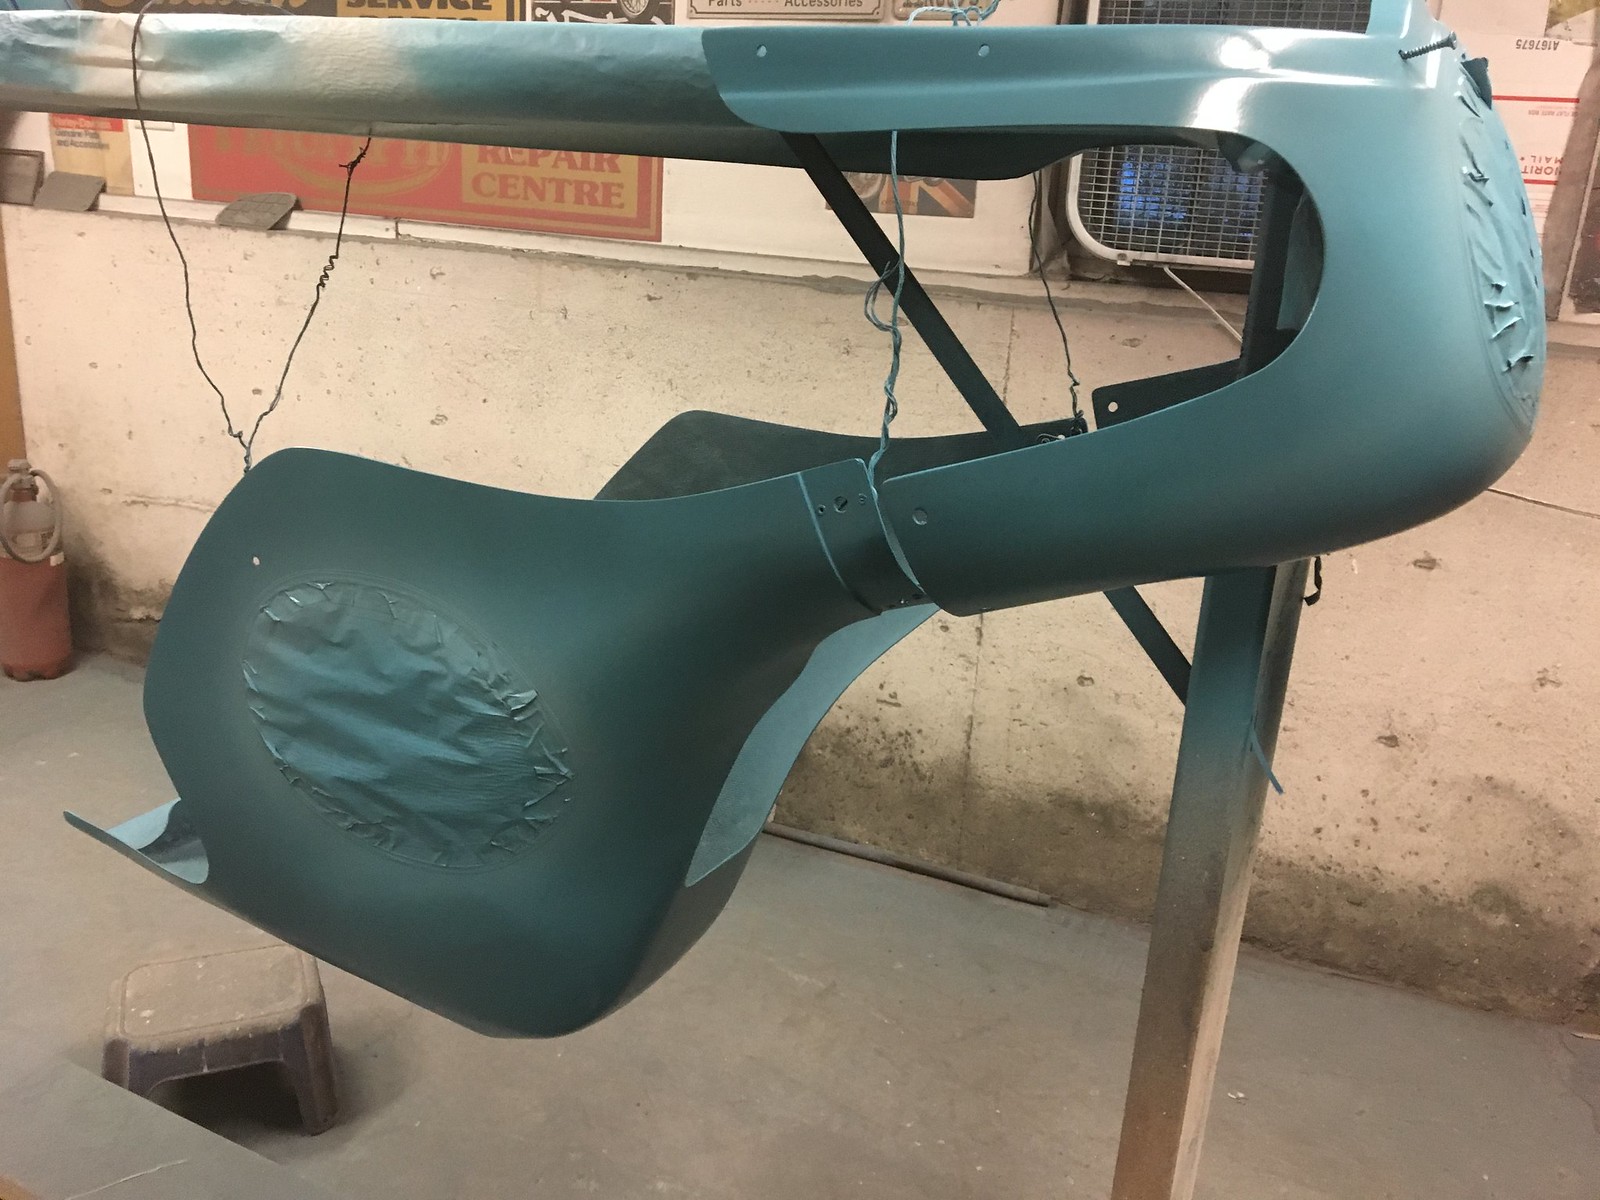
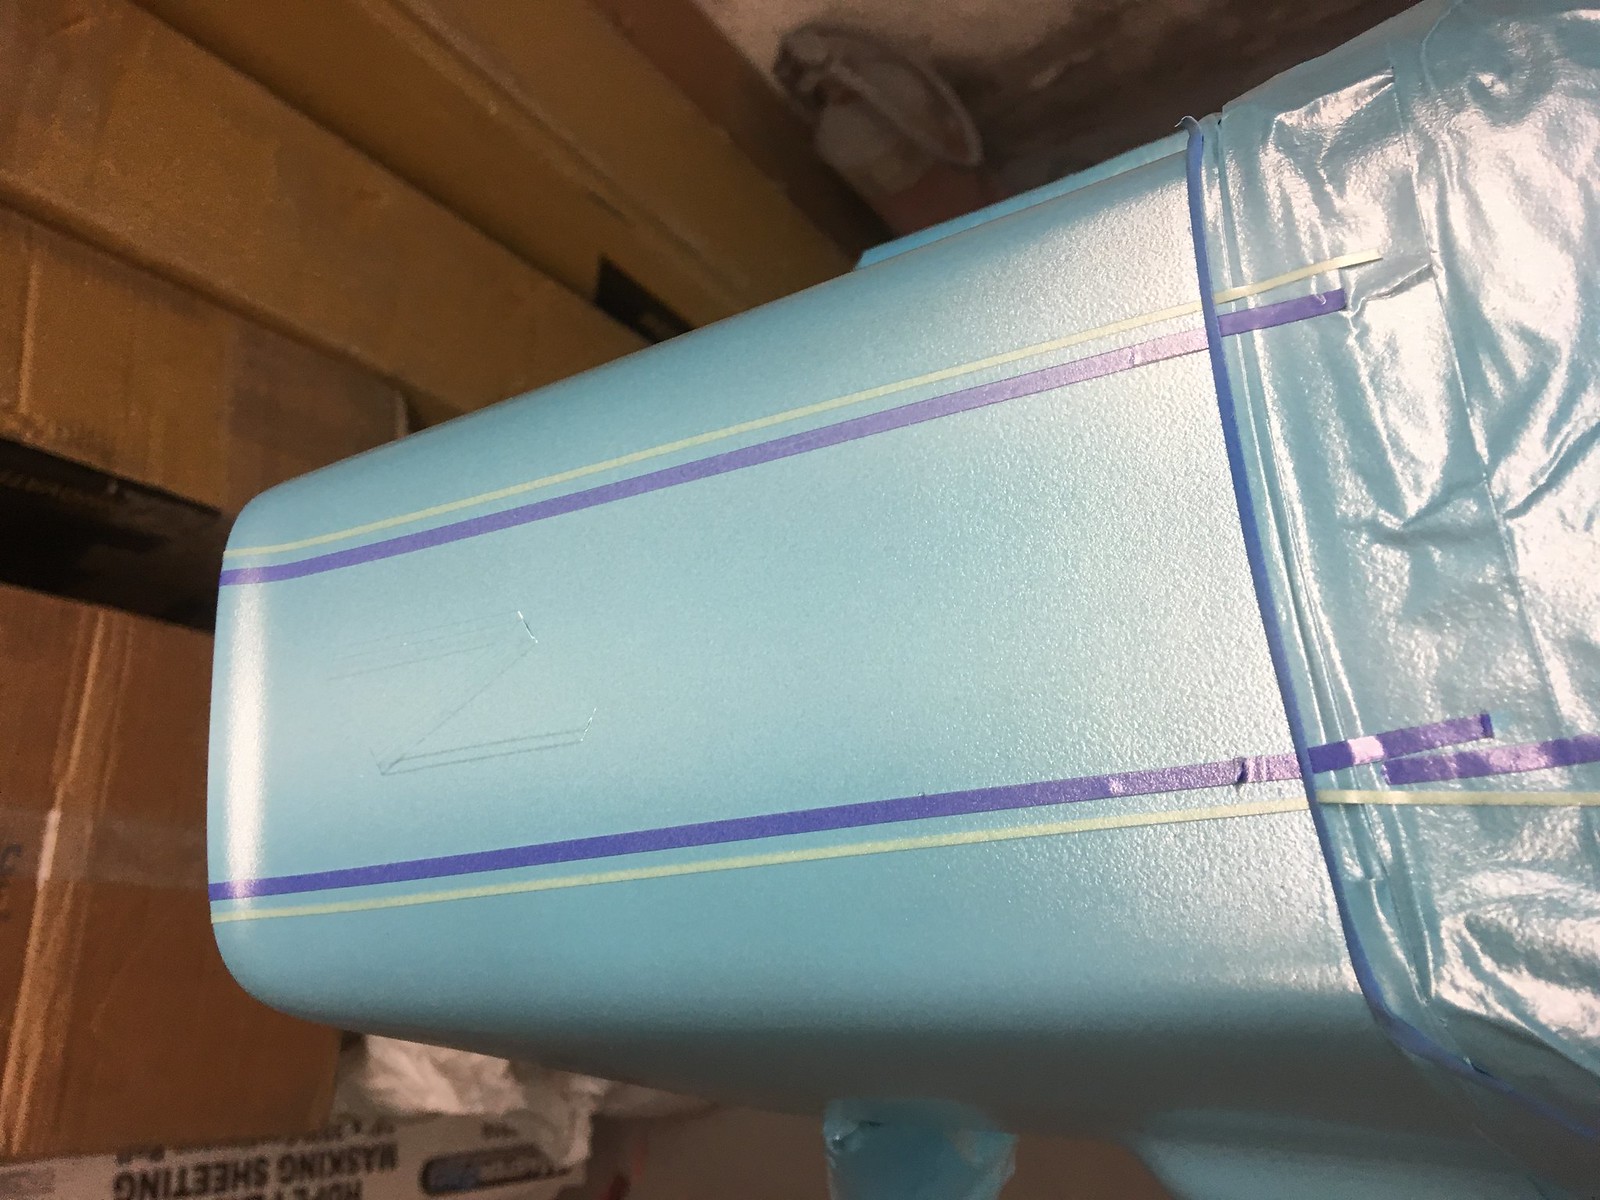
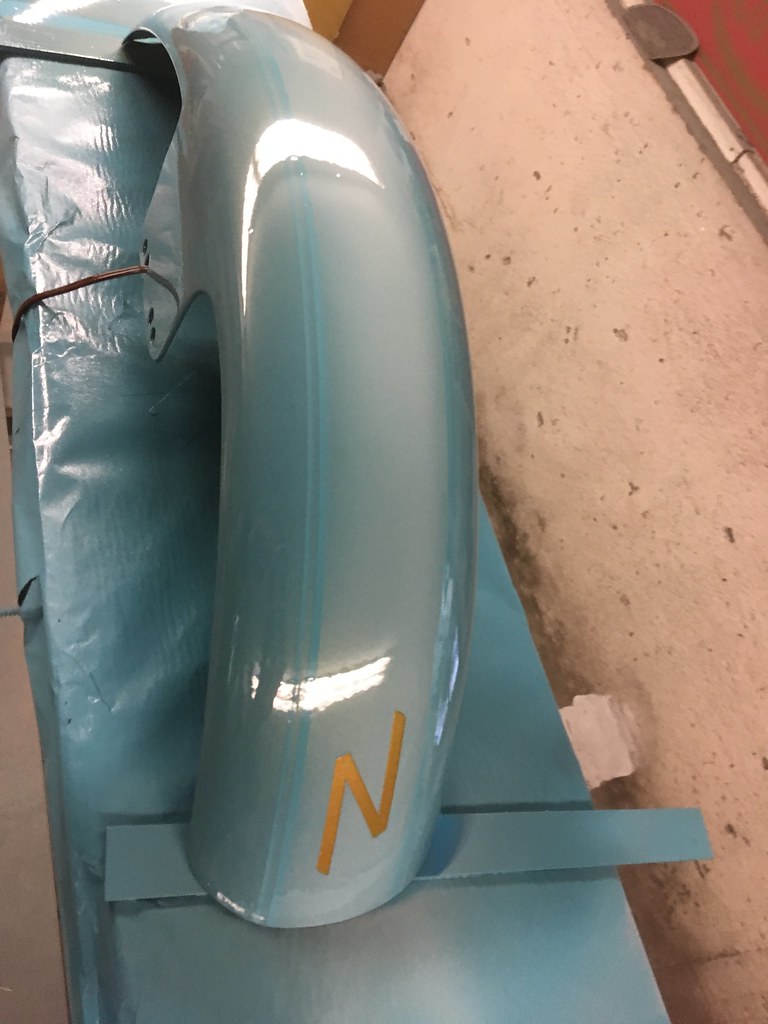
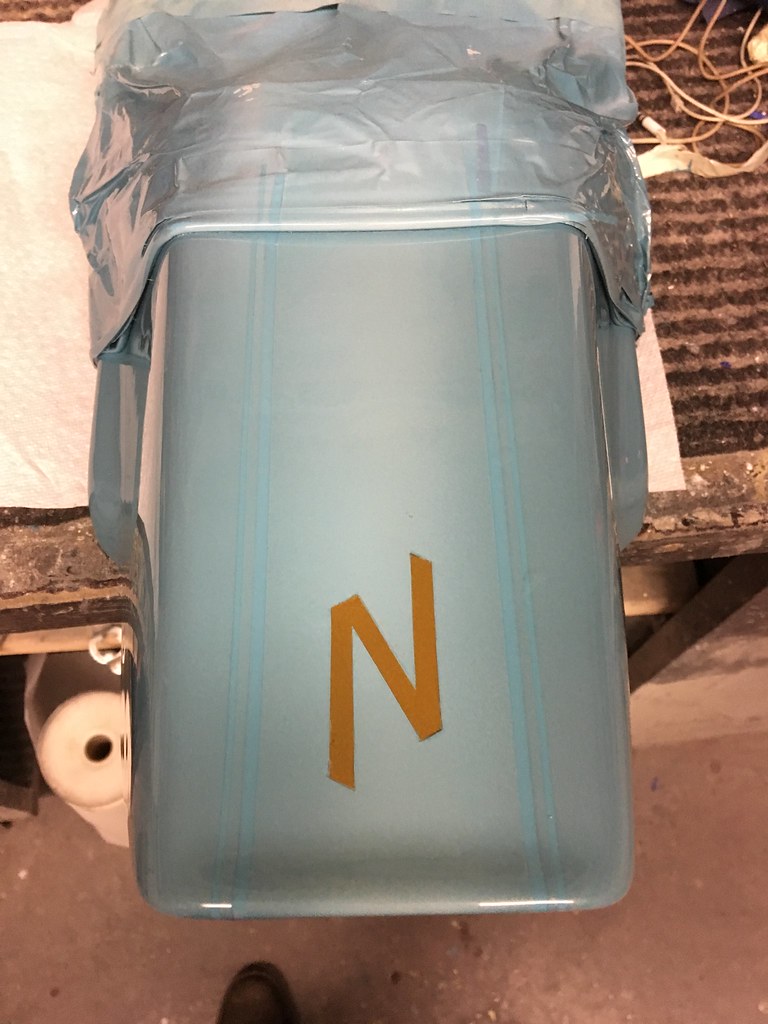
Fender and tail section in process below, note the masked pinstripes and “N” logos, which get removed before clearing

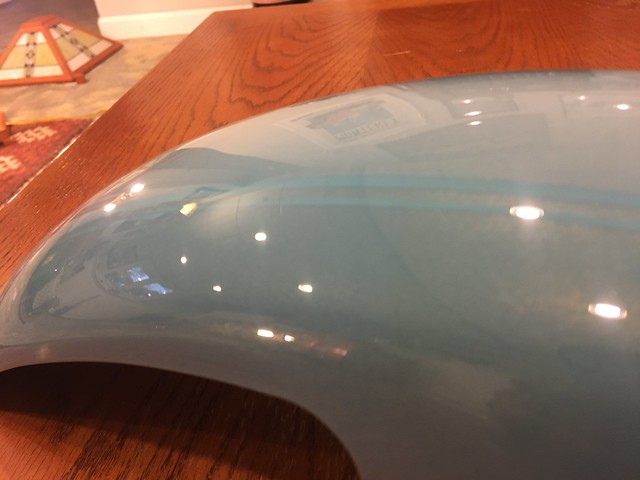
Parts cleared, prior to buffing –


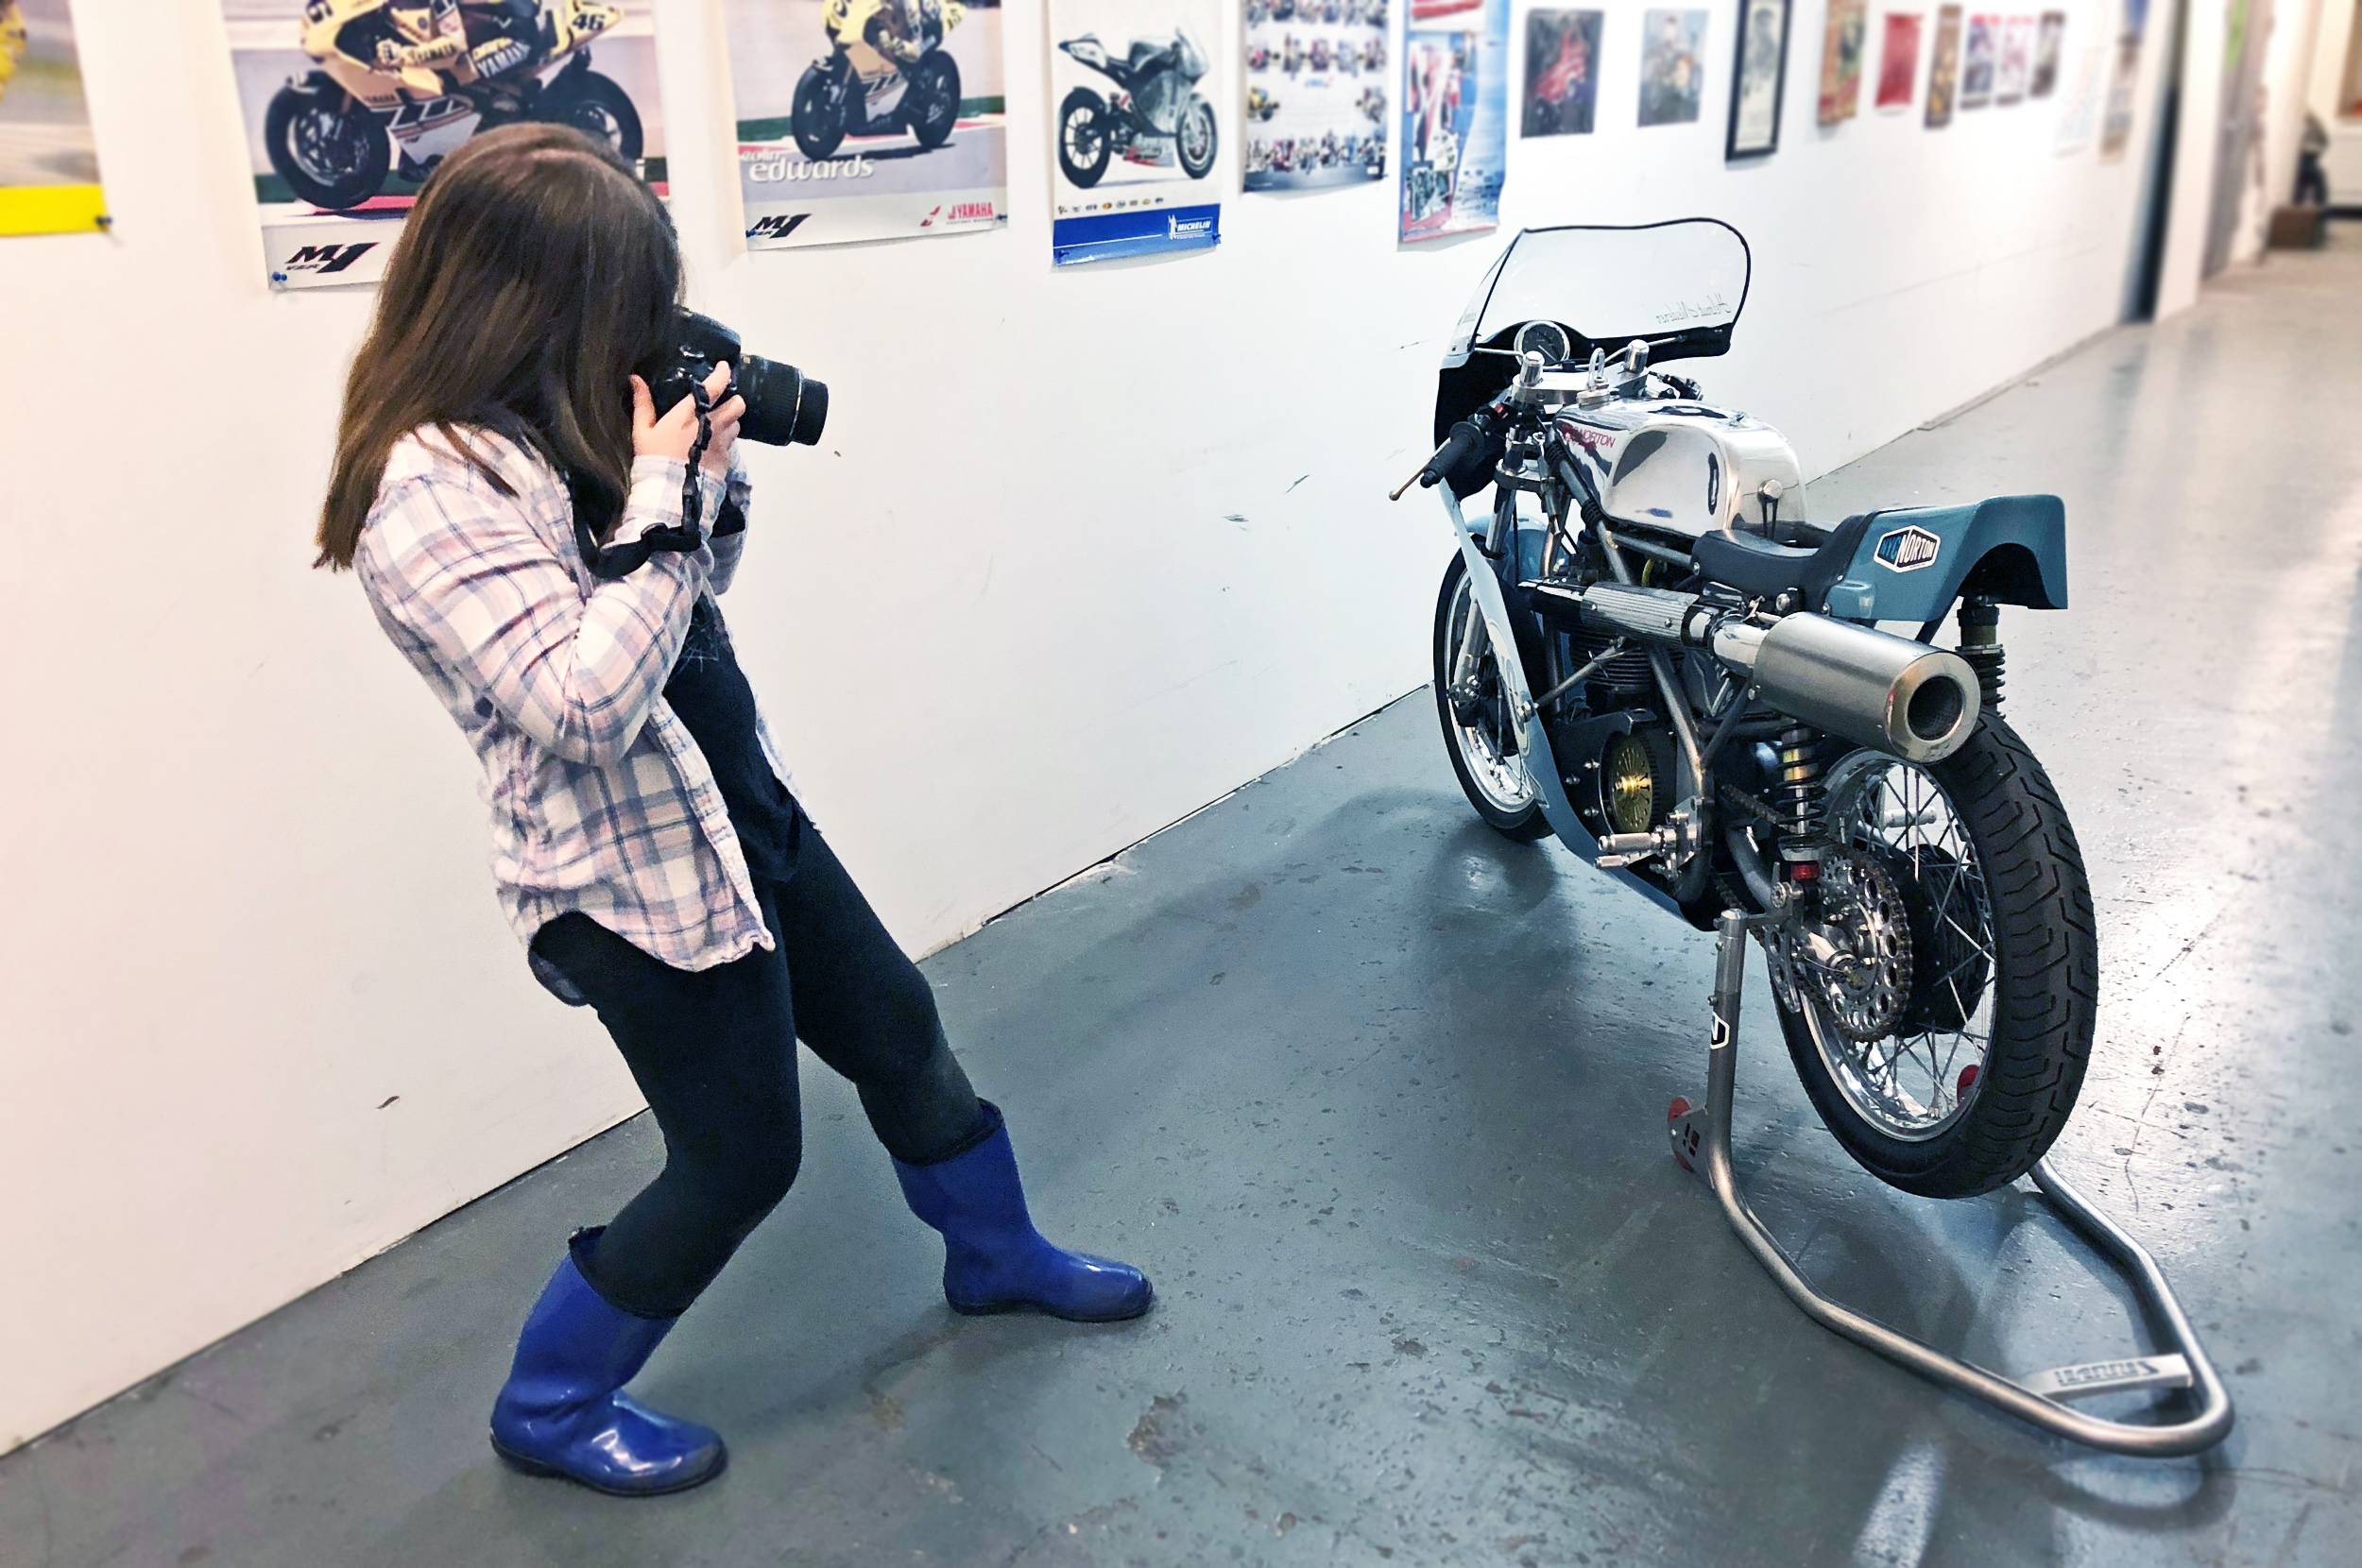
Success! After all parts were wetsanded and buffed. I set them up in my den for some pre-delivery photos, all the while thinking, “DON’T SCRATCH ANYTHING!”

Sunday, March 11th, ready for delivery, the parts, tucked in safely in the back of my trusty Passat Wagon.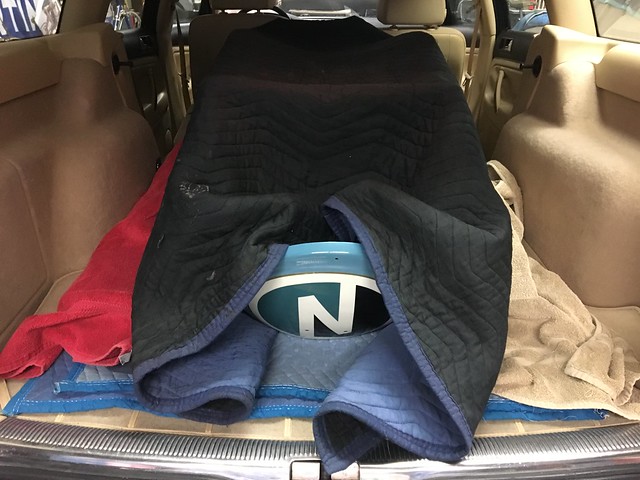
And so on a dry, chilly, overcast morning, I drove down to Glenn’s Fall’s NY, where Kenny met me for the hand off in he parking lot of a Dollar General Store, not glamorous by any means, but it worked for us both. This would be the first time he would see the completed parts in person. It’s 40 degrees and I’m sweating. Why? Kenny is extremely meticulous and it all came down to this moment. I’m a hero or a fool. He pulled in, got out of his van and we exchanged pleasantries. But the time had come. I uncovered the parts and pulled them out in the daylight. I could feel my stomach churning, my pulse racing. He took one look and was instantly all smiles. He was “over the moon” as he put it. And I was greatly relieved that my part of this little adventure was soon to be over as he carefully placed the parts in the rear of his Sprinter van. We shook hands, said goodbye and Kenny was headed back to Jersey City. I sat there in silence for a few minutes by myself and just took it all in. In the end, it was all worth it. The sense of achievement and satisfaction at a job well done had me floating on air. I headed back up to Vermont with a smile on my face and the sun poking through the clouds. Kenny and his main man Jon had the bike together and ready for a photo shoot in prep for the museum the next day
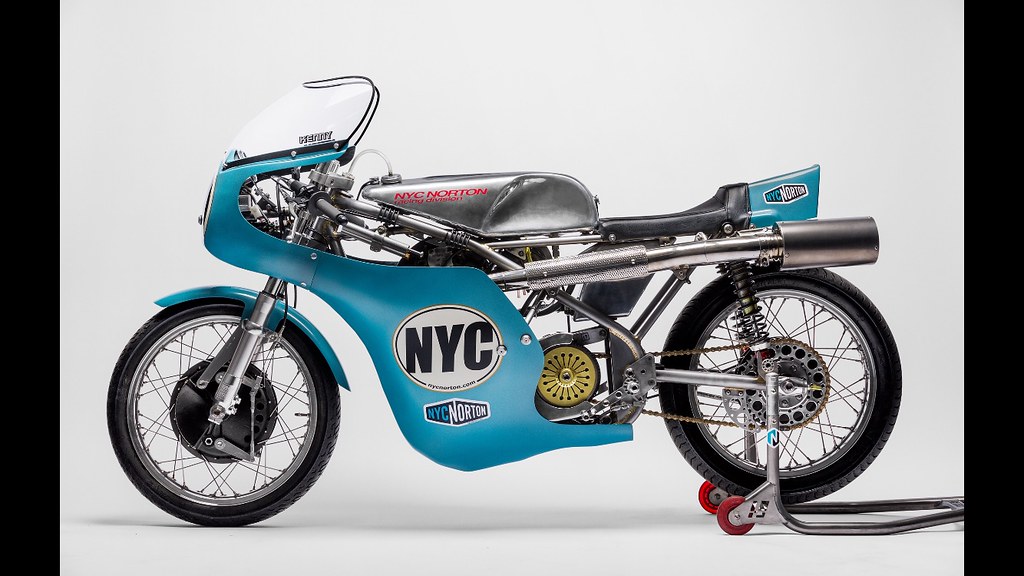
Set up and ready to shoot –
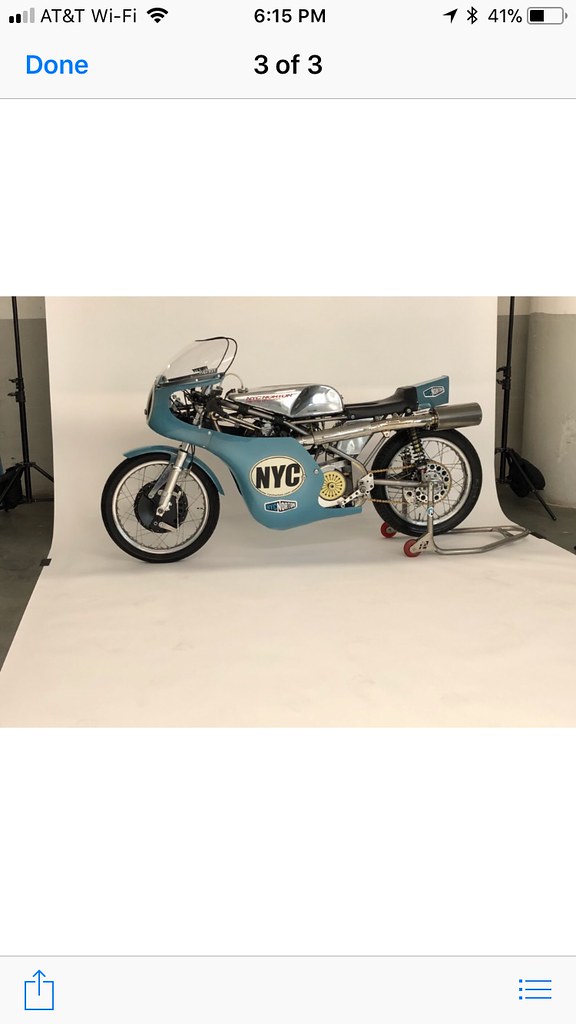
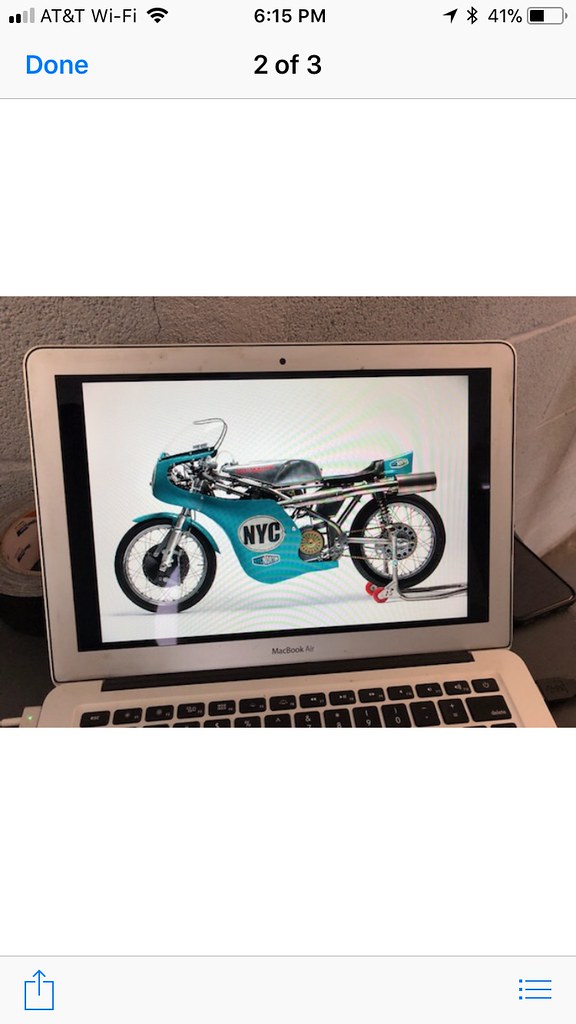
The first pre-public glimpse of the completed bike that Kenny sent to me
All done! Kenny and his crew christened it “Blue Monday” And that seems a good fit.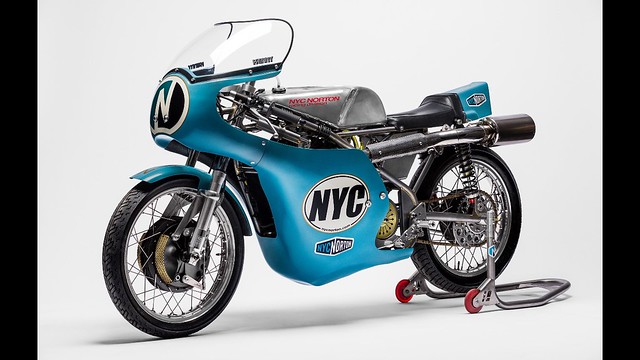

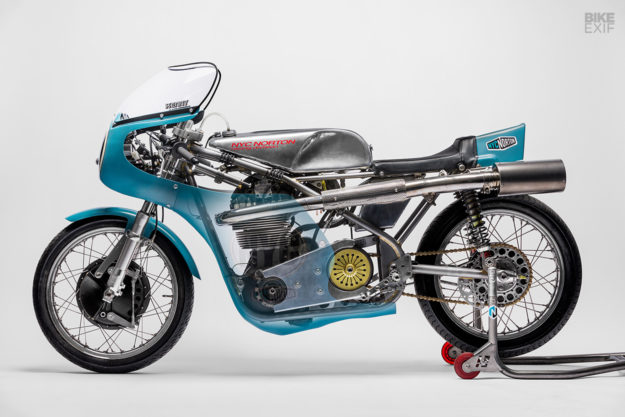

Final Destination, on display in the “Custom Revolution” Exhibit in The Peterson Automotive Museum.
Final thoughts from me –
It’s always exciting when you see something you helped to create come to life. I stressed hard over this bike during those two plus weeks. I didn’t sleep well and really had to pull everything I had to complete it and complete it well. There were screw ups, complications, frustration, aggravation and most anything else that ends in “tion”. But I can honestly say with certainty. I’m very proud of the final results. I hope to see the bike in person in LA. Would I do it again? Sure! But can I maybe have three weeks this time…PLEASE?
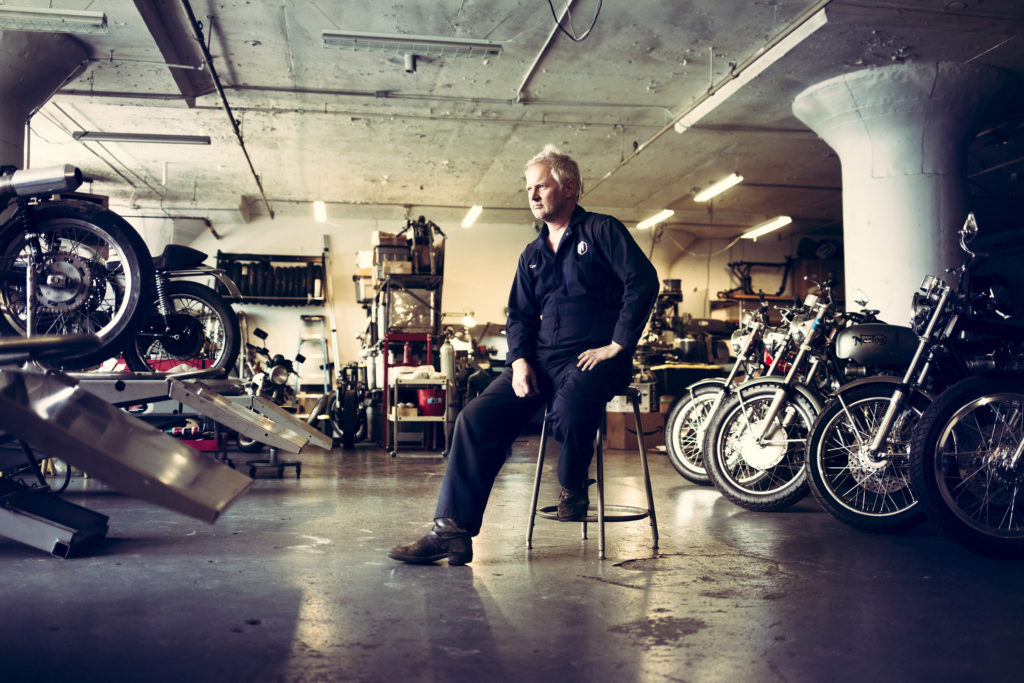
Welcome to the Vintage Vendor website! First off, a HUGE thank you to Jerry Doe and Mina Tung @ dev2host.com for this beautiful site that they created for me. Jerry did my original site some years back. So it’s been awhile since I did a serious upgrade. The old one was well past its expiration date. Now, with new pictures and much new content to explore and especially both Jerry and Mina’s patience, I hope you will take a few minutes and enjoy The Vintage Vendor. I am going to be making tweaks and changes fairly often to keep things fresh. So welcome in!